Nothing beats the simple joy of a warm, gooey dessert that’s effortless to make yet bursts with tropical sweetness. This Pineapple Dump Cake Recipe is exactly that—a no-fuss, crowd-pleasing treat that combines juicy pineapple and a buttery cake topping for pure comfort in every bite.

Jump to:
Why You'll Love This Recipe
I’ve made this Pineapple Dump Cake Recipe more times than I can count because it’s honestly one of the easiest desserts that tastes like I spent hours in the kitchen. When you want a quick dessert that still feels special, this is your go-to.
- Super Simple Preparation: You just “dump” everything in layers—no mixing bowl or fancy techniques needed.
- Incredible Flavor Balance: The sweetness of the pineapple perfectly complements the buttery, crisp cake topping.
- Great for Any Occasion: Whether it’s a casual weeknight treat or a potluck centerpiece, this cake always impresses.
- Fun to Customize: You can easily tweak the top layer or add spices for your own touch.
Ingredients & Why They Work
This recipe works because the ingredients each do something special: the pineapple brings juicy sweetness with a bit of tang, the cake mix provides the perfect crumbly topping, and butter ties it all together with richness. Grab good-quality canned pineapple for the best flavor and don’t skip the butter—that’s the magic.
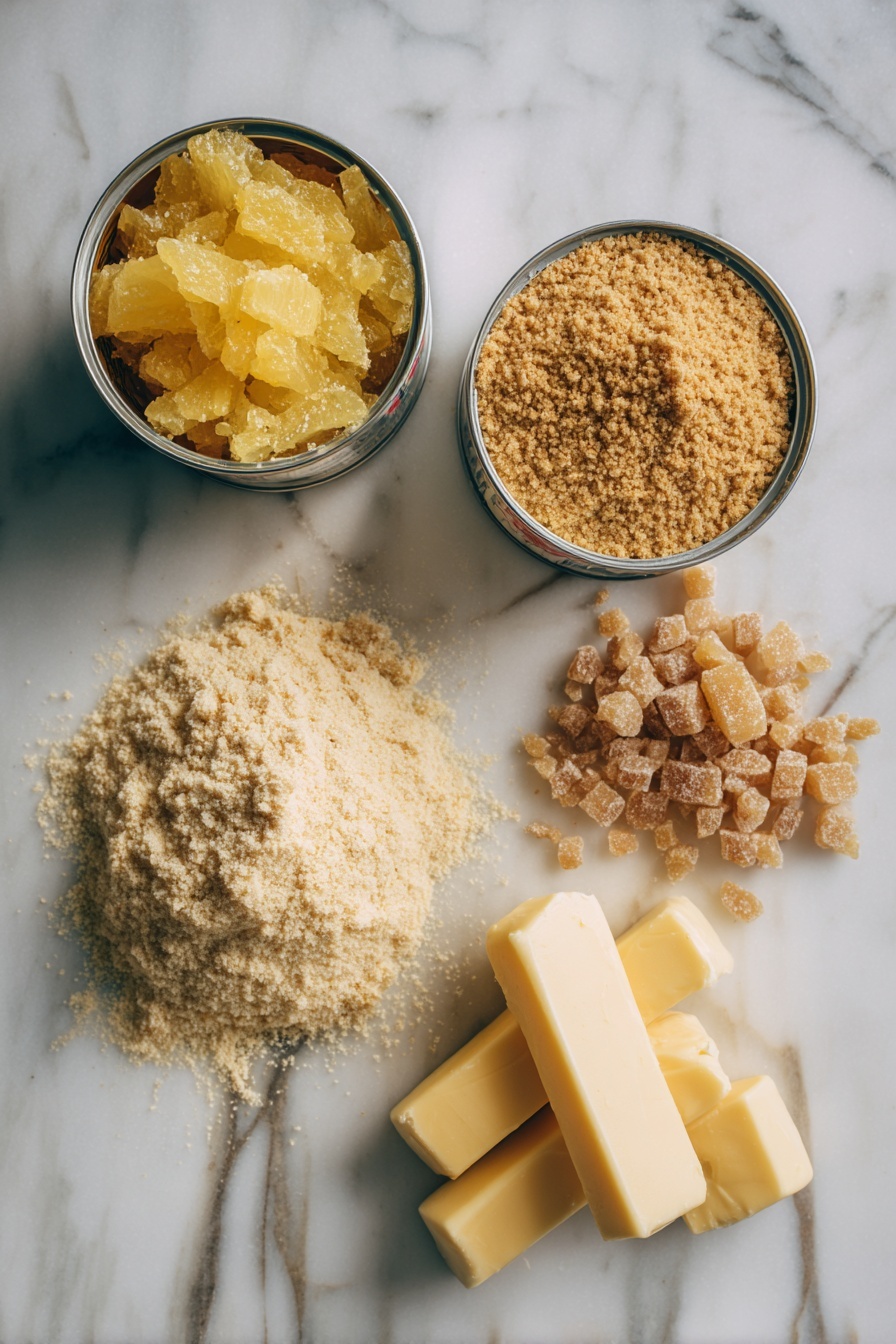
- Crushed Pineapple: Use undrained for that essential fruity juice that keeps the cake moist and flavorful.
- Yellow Cake Mix: A classic, easy base that crisps up beautifully as it bakes.
- Brown Sugar: Adds a deeper caramel sweetness to the topping.
- Unsalted Butter: Melted and drizzled to create that golden, buttery crust everyone loves.
Make It Your Way
I usually stick to the classic version because it’s just so foolproof. But I’ve had fun swapping out the yellow cake mix for funfetti when making this for a birthday. Don’t be shy—this recipe is forgiving and welcomes your twists.
- Add a Sprinkle of Cinnamon or Nutmeg: I love this little touch on top—it adds warmth and depth to the flavor.
- Use Pineapple Chunks Instead: For a bit more texture, chunks work great, just be sure to keep the juice.
- Try Sliced Butter Instead of Melted: This creates a slightly different, more layered topping texture if you want to experiment.
- Make It Gluten-Free: Swap in your favorite gluten-free cake mix without skipping a beat.
Step-by-Step: How I Make Pineapple Dump Cake Recipe
Step 1: Prep with Ease
First things first, preheat your oven to 350°F (175°C). I like to give my 9×13-inch dish a light grease using butter or a nonstick spray—this prevents sticking and makes cleanup easier.
Step 2: Pineapple Time
Grab your canned crushed pineapple and pour it right into the dish—don't drain it! The juice is key to keeping the cake moist and juicy. Spread it evenly so every bite gets some pineapple goodness.
Step 3: Sprinkle the Cake Mix
Now, add the dry yellow cake mix over the pineapple. No mixing needed—just sprinkle so the entire pineapple layer is covered. This is part of what makes this recipe so wonderfully simple.
Step 4: Sweeten with Brown Sugar
Sprinkle the brown sugar on top of the cake mix. This adds that lovely caramel flavor and helps create a golden crust as it bakes.
Step 5: Butter It Up
Pour melted butter evenly over the top. Make sure most of the cake mix gets covered—this step is the secret to avoiding dry spots and getting that perfect crisp topping.
Step 6: Bake to Golden Perfection
Pop your dish in the oven for 40-45 minutes. You’ll know it’s done when the top is bubbly and golden brown. Then, let it rest for 10-15 minutes to set but stay gooey—my favorite time to sneak a little taste test!
Top Tip
Through many batches of this Pineapple Dump Cake Recipe, I’ve picked up a few tips to make sure yours turns out just right every time:
- Melted Butter Coverage: Pour your melted butter slowly and evenly—if any dry spots are left uncovered, you could get less tender patches on top.
- Baking Rack Position: I always bake mine on the middle oven rack for even browning on top and a perfectly cooked inside.
- Rest Before Serving: It’s tempting to dig in right away, but letting it chill for a bit makes serving easier and keeps the gooey texture intact.
- Butter Choices: If you want a different texture, try thin pats of cold butter on top instead of melted—the topping crisps differently but is just as delicious.
How to Serve Pineapple Dump Cake Recipe
Garnishes
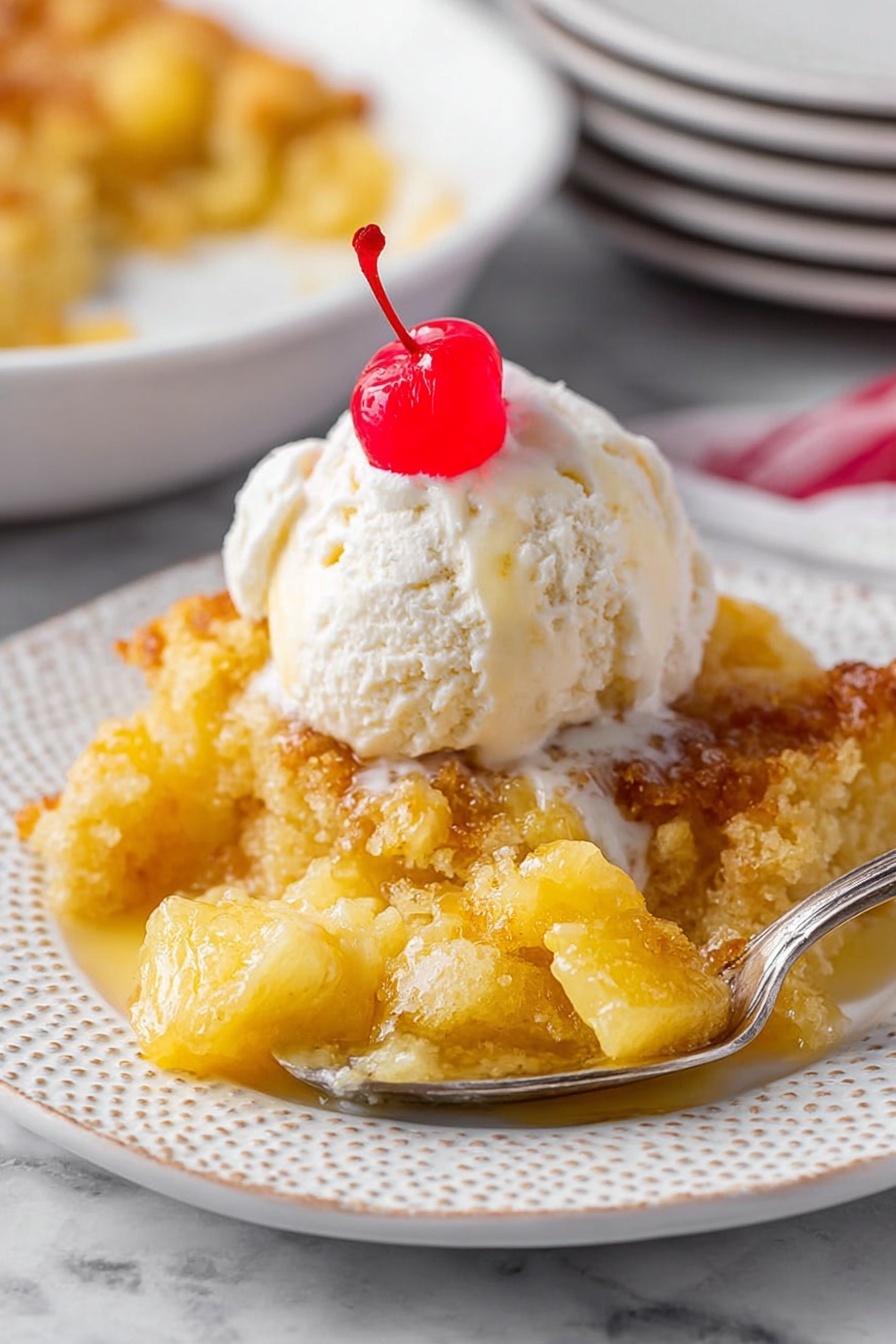
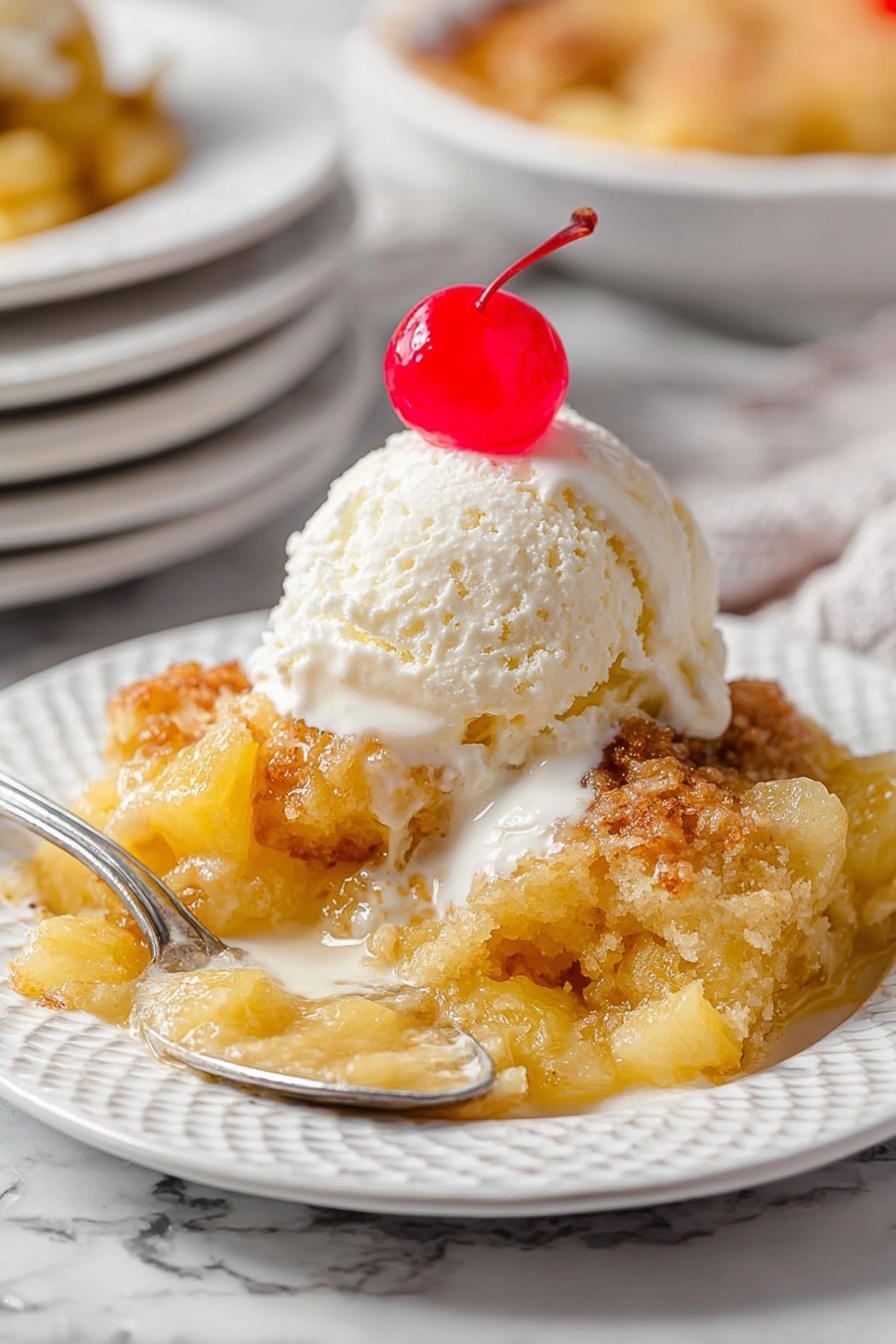
I always top my warm Pineapple Dump Cake with a big scoop of creamy vanilla ice cream and a bright red maraschino cherry. The cold ice cream melting over the warm cake is just dreamy and balances the sweetness perfectly.
Side Dishes
If I’m serving this at a family gathering, I pair it with a light green salad or some whipped cream alongside fresh fruit. It keeps things fresh and balances the richness of the cake.
Creative Ways to Present
For parties, I’ve served this dump cake in individual ramekins topped with toasted coconut flakes and a sprig of mint—it makes the tropical vibe pop and feels fancy without extra effort.
Make Ahead and Storage
Storing Leftovers
I keep leftovers in an airtight container in the fridge, and they usually last about 3 days. When you reheat a portion, it’s best short and sweet—20 to 30 seconds in the microwave to keep it warm without drying out.
Freezing
This Pineapple Dump Cake freezes well if you wrap it tightly in plastic wrap and foil. Freeze for up to 2 months. I recommend thawing overnight in the fridge for the best texture, then warming in the oven until bubbly again.
Reheating
I prefer reheating leftovers in a preheated oven at 325°F for 10-15 minutes to bring back that crisp topping. The microwave works too, but the oven really revives the texture nicely.
Frequently Asked Questions:
You can use fresh pineapple chopped into small pieces, but make sure to include some pineapple juice or add a little water to keep the moisture level up. Fresh pineapple is less juicy than canned, so the texture might be less gooey but still delicious.
A classic yellow cake mix is my favorite because it creates a nicely crisp, buttery topping. You could experiment with white or butter-flavored cake mix, but avoid mixes with added pudding because it can change the texture of the topping.
Yes! You can assemble the layers without butter, cover it tightly, and refrigerate up to 24 hours. When you're ready, add the butter on top and bake. This is a lifesaver for busy days or entertaining.
Make sure the melted butter is drizzled evenly and covers most of the dry cake mix. If you notice some dry patches before baking, gently spoon a little more butter there to avoid those crusty dry spots.
Final Thoughts
This Pineapple Dump Cake Recipe has been my secret weapon on busy nights and a guaranteed crowd-pleaser for casual gatherings. It's the kind of dessert that feels warm and comforting but is effortless enough to whip up anytime. Give it a try—I promise it’ll become one of your favorite “go-to” sweet treats, just like it is for me.
Print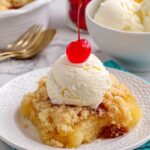
Pineapple Dump Cake Recipe
- Prep Time: 10 minutes
- Cook Time: 45 minutes
- Total Time: 55 minutes
- Yield: 12 servings
- Category: Dessert
- Method: Baking
- Cuisine: American
- Diet: Vegetarian
Description
Delightfully easy and crowd-pleasing Pineapple Dump Cake with layers of crushed pineapple, yellow cake mix, brown sugar, and melted butter baked to golden perfection. Perfect for serving warm with ice cream for a simple dessert.
Ingredients
Pineapple Layer
- 2 20-ounce cans crushed pineapple undrained
Cake Layer
- 15.25 ounce yellow cake mix
- ½ cup brown sugar
Topping
- 1 cup (2 sticks) unsalted butter melted
Instructions
- Preheat Oven: Preheat your oven to 350°F (175°C). Lightly grease a 9×13-inch baking dish with butter or nonstick spray to prevent sticking.
- Add Pineapple Layer: Pour the undrained crushed pineapple evenly into the prepared baking dish, spreading it out to cover the bottom.
- Sprinkle Cake Mix: Evenly sprinkle the dry yellow cake mix over the pineapple layer, making sure to fully cover the fruit.
- Add Brown Sugar: Evenly sprinkle the brown sugar over the cake mix layer for added sweetness and caramelization.
- Drizzle Butter: Drizzle the melted butter over the top, ensuring it covers as much of the dry mix as possible to achieve a moist and golden crust.
- Bake: Place the dish on the middle oven rack and bake for 45 minutes until the top is golden brown and bubbly.
- Cool Slightly: Remove the cake from the oven and let it cool for 10-15 minutes to set while remaining warm and gooey.
- Serve: Serve warm, optionally topped with a scoop of vanilla ice cream and a maraschino cherry for an extra special touch.
Notes
- Store leftovers in an airtight container in the refrigerator for up to 3 days.
- Reheat individual portions in the microwave for 20-30 seconds before serving.
- Freeze the cake wrapped tightly for up to 2 months; thaw overnight in the fridge before reheating.
- For make-ahead convenience, assemble the layers without butter, cover, and refrigerate for up to 24 hours; add butter just before baking.
- Make sure melted butter covers most of the cake mix to prevent dry spots on the topping.
- For a different texture, slice the butter into thin pats instead of melting it to dot on top.
- Bake on the middle rack to ensure even browning and cooking.
- Allow the cake to rest 10-15 minutes after baking so it sets but stays warm and gooey.
Nutrition
- Serving Size: 1 serving
- Calories: 320 kcal
- Sugar: 28 g
- Sodium: 200 mg
- Fat: 15 g
- Saturated Fat: 9 g
- Unsaturated Fat: 5 g
- Trans Fat: 0 g
- Carbohydrates: 42 g
- Fiber: 1 g
- Protein: 2 g
- Cholesterol: 40 mg


Leave a Reply