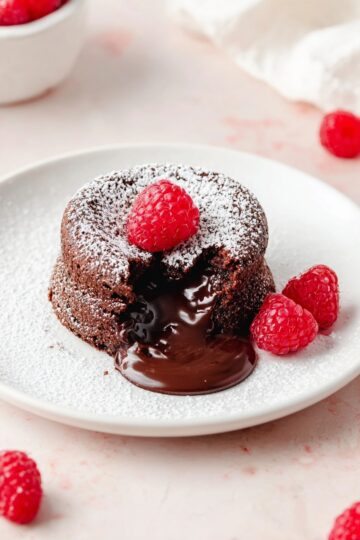
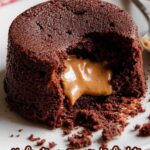
Nothing says indulgence quite like a warm, ooey-gooey dessert straight from the oven. This Peanut Butter Chocolate Lava Cakes Recipe brings together the rich, melty chocolate center you love with a luscious layer of creamy peanut butter that’s absolutely irresistible. I can’t wait to share this with you—it’s like a little celebration in every single cake!

Jump to:
- Why You'll Love This Recipe
- Ingredients & Why They Work
- Make It Your Way
- Step-by-Step: How I Make Peanut Butter Chocolate Lava Cakes Recipe
- Top Tip
- How to Serve Peanut Butter Chocolate Lava Cakes Recipe
- Make Ahead and Storage
- Frequently Asked Questions:
- Final Thoughts
- Peanut Butter Chocolate Lava Cakes Recipe
Why You'll Love This Recipe
I’ve tried a lot of molten chocolate cakes, and adding peanut butter elevates the whole experience to something unforgettable. Whether it’s for date night, a birthday, or just because you deserve a treat, these cakes hit all the right notes.
- Perfectly Individual: Each cake is its own little molten masterpiece—ideal for sharing or savoring solo.
- Quick & Easy: From start to finish, it takes about 35 minutes—not long for such an impressive dessert.
- Decadent Flavor Combo: The chocolate and peanut butter duo is a match made in dessert heaven.
- Elegant Presentation: Serve them straight from the ramekins inverted on plates—you’ll feel like a pro chef!
Ingredients & Why They Work
Before you shop, you’ll want to look for good-quality semisweet chocolate and creamy commercial peanut butter to get the best melty, smooth texture. A few pantry staples pull this recipe together beautifully with minimal fuss.
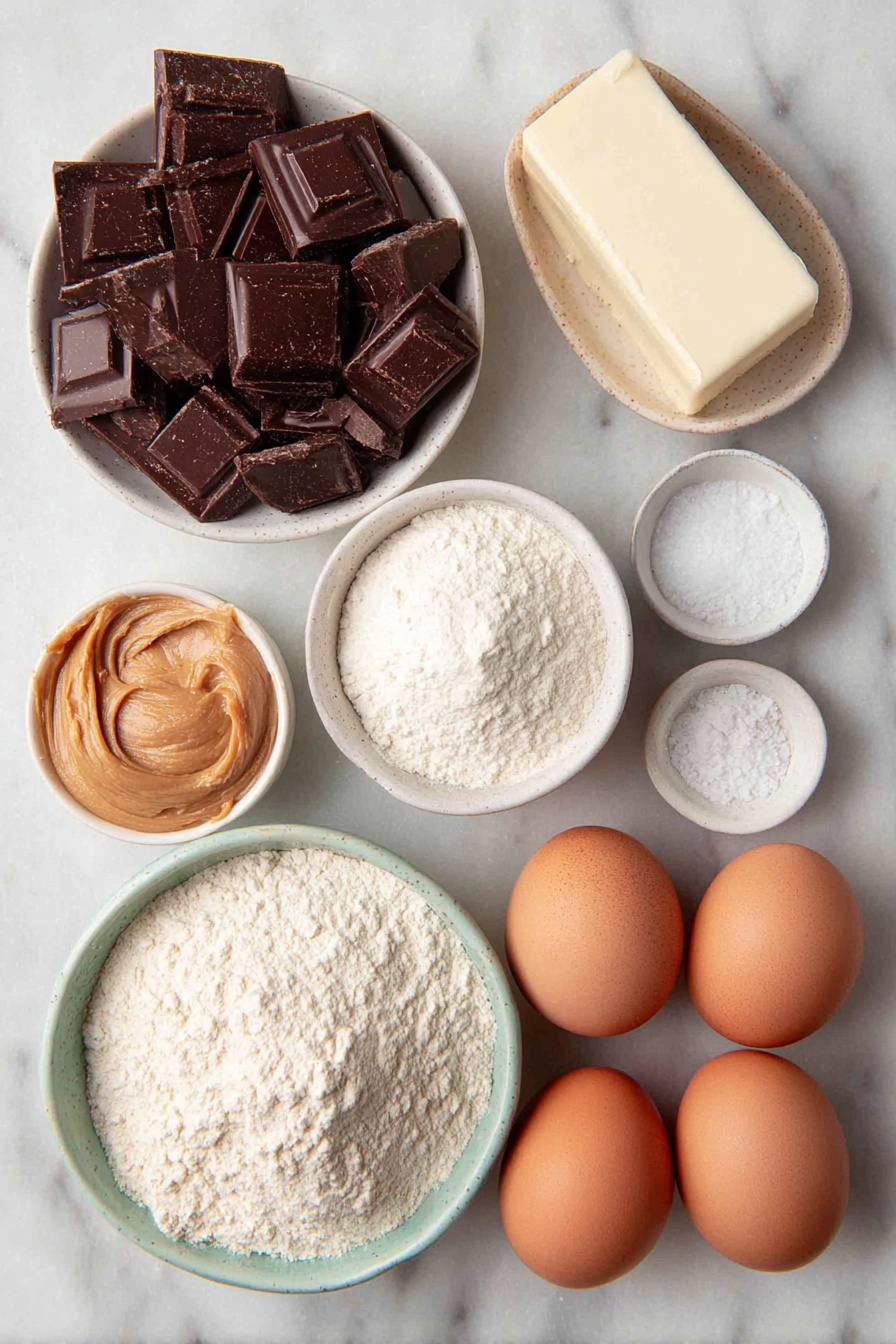
- Semi-sweet chocolate: Provides rich, smooth flavor and the perfect melting consistency for that molten core.
- Unsalted butter: Adds creaminess and helps create the silky texture of the batter.
- All-purpose flour: Gives just enough structure to hold the cake but keeps it light and tender.
- Confectioners’ sugar: Sweetens delicately while keeping the cakes soft.
- Salt: A tiny pinch balances the sweetness and enhances the chocolate’s depth.
- Eggs and egg yolks: These enrich the batter, producing that luxurious, fudgy texture.
- Creamy peanut butter: Use a commercial brand like Jif or Skippy for best melt and tang.
- Nonstick cooking spray and cocoa powder: Essential for easy cake release and a clean presentation.
- Optional toppings: Ice cream, melted peanut butter, and chocolate syrup bring it all home with extra flavor and flair.
Make It Your Way
One of the best parts about this Peanut Butter Chocolate Lava Cakes Recipe is how easy it is to adapt to your taste or pantry. Whether you want to add a little extra crunch, swap out the peanut butter, or keep it classic, there’s room to make it truly yours!
- Peanut Butter Variations: I’ve found that using smooth, creamy peanut butter like Jif or Skippy gives the perfect gooey center. If you're feeling adventurous, try swirling in a spoonful of Nutella alongside the peanut butter for a decadent twist that adds hazelnut richness.
- Plain Lava Cakes: If peanut butter isn’t your thing, simply skip it altogether. The cakes bake up beautifully with that signature molten center—just follow the same 12 to 13-minute baking time. You’ll still get a rich, chocolaty treat that’s sure to impress.
- Muffin Pan Alternative: No ramekins? No problem! Grease and dust 6 muffin cups with cocoa powder. Bake at 425°F for 8 to 10 minutes, then invert onto plates. The cakes will be a bit smaller, but just as scrumptious and shareable.
- Serving Ideas: I love topping mine with a scoop of vanilla ice cream and a drizzle of melted peanut butter or chocolate syrup. You can even sprinkle a pinch of flaky sea salt on top to balance the sweetness.
Step-by-Step: How I Make Peanut Butter Chocolate Lava Cakes Recipe
Step 1: Prepare Your Ramekins
Start by spraying four 6-ounce ramekins lightly with nonstick cooking spray. Then, dust the insides generously with cocoa powder. This step ensures your lava cakes will effortlessly slip out once baked. Trust me, a well-prepared ramekin is key to that perfect presentation!
Step 2: Get Your Oven Ready
Preheat your oven to 425°F (218°C). This high temperature is essential to cook the cake’s outer layer quickly, while keeping that irresistible molten center soft and gooey.
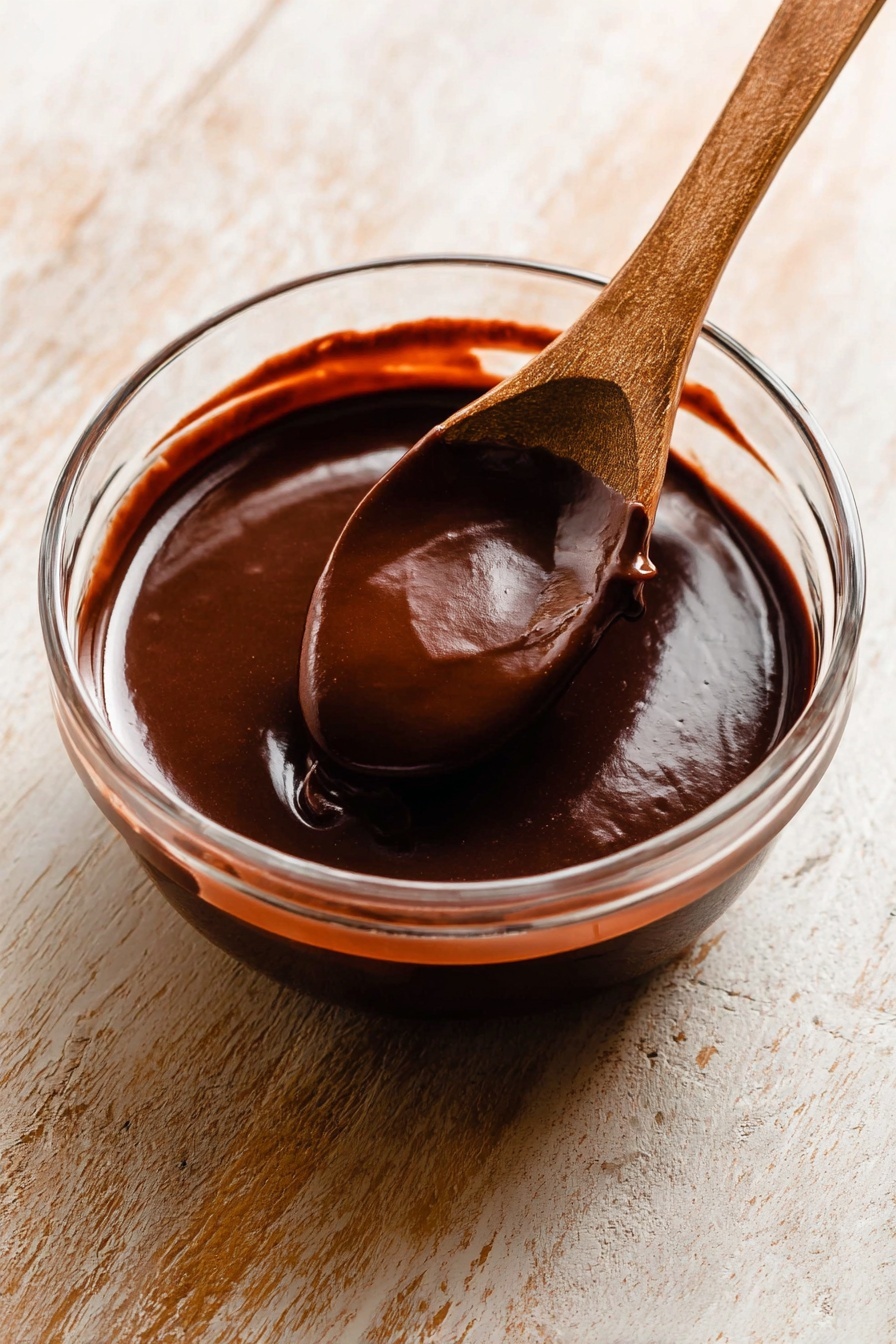
Step 3: Melt the Chocolate and Butter
Coarsely chop 6 ounces of your favorite semi-sweet chocolate—quality matters here. Place the butter and chocolate in a microwave-safe bowl and heat in 10-second intervals, stirring well between each until the mixture is silky smooth. Let it cool slightly to avoid scrambling the eggs later on.
Step 4: Mix Dry Ingredients
In a small bowl, combine ¼ cup all-purpose flour, ½ cup confectioners’ sugar, and ⅛ teaspoon salt. Whisk these together until evenly mixed. This ensures your batter is smooth and lump-free, essential for those tender cake edges.
Step 5: Whisk the Eggs
In a separate bowl, whisk 2 large eggs plus 2 yolks until the mixture is uniform and slightly frothy. This step adds richness and structure to your batter that will bake up tender but sturdy enough to hold the molten center.
Step 6: Combine Everything Into Batter
Pour the dry ingredients and eggs into the melted chocolate-butter bowl. Use a silicone spatula or wooden spoon to gently fold the mixture together. If you spot any lumps, a few gentle strokes with a whisk will smooth things out. The batter should be thick but pourable.
Step 7: Assemble Your Lava Cakes
Spoon the smooth chocolate batter evenly into your prepared ramekins, filling them up close to the top. Then, add about 2 teaspoons of creamy peanut butter on top of each cake. Press it gently with a spoon so it sinks slightly into the batter but still peeks out—the molten surprise inside!
Step 8: Bake to Perfection
Place the ramekins on a baking sheet and slide them into your preheated oven. Bake for 12 to 13 minutes. Look for firm edges and slightly soft, jiggly tops—this signals your lava cake is perfectly molten inside.
Step 9: The Grand Reveal
Once out of the oven, let the cakes rest for 1 minute. Then, carefully cover each ramekin with an inverted plate and flip it over (oven mitts recommended!). The cakes should slide right out, revealing their luscious molten center, ready to wow anyone lucky enough to taste.
Step 10: Serve Immediately and Enjoy
To elevate your dessert, serve warm with a scoop of vanilla ice cream and drizzle with melted peanut butter or chocolate syrup. The contrast of cold ice cream and hot lava cake is pure magic. Dive in right away for the ultimate melt-in-your-mouth experience!
Top Tip
When it comes to perfecting this Peanut Butter Chocolate Lava Cakes Recipe, a few little tricks can take your dessert from great to unforgettable. These tips come straight from my own kitchen adventures, so you can avoid the common pitfalls and enjoy melt-in-your-mouth magic every time.
- Use the Right Peanut Butter: I’ve found that creamy commercial peanut butter brands like Jif or Skippy work best here. They melt smoothly into the batter and give that soft, luscious peanut butter center. Avoid natural or crunchy versions—they can alter the texture and make it harder to achieve that gooey effect.
- Perfect Your Inversion Technique: Cooling for exactly 1 minute after baking is crucial. Too hot and the cakes might fall apart; too cool and the lava won’t flow nicely. Also, covering the ramekin firmly with an inverted plate and using oven mitts while flipping keeps everything safe and neat.
- Don’t Overmix the Batter: Gently folding your ingredients until just combined helps keep that tender crumb. Overmixing can make the cakes tough rather than soft and silky.
- Cocoa Powder Dusting is a Game-Changer: Dusting your ramekins with cocoa powder—not flour—helps the cakes release cleanly while enhancing the chocolate flavor. This little step has saved me from many broken cakes!
How to Serve Peanut Butter Chocolate Lava Cakes Recipe
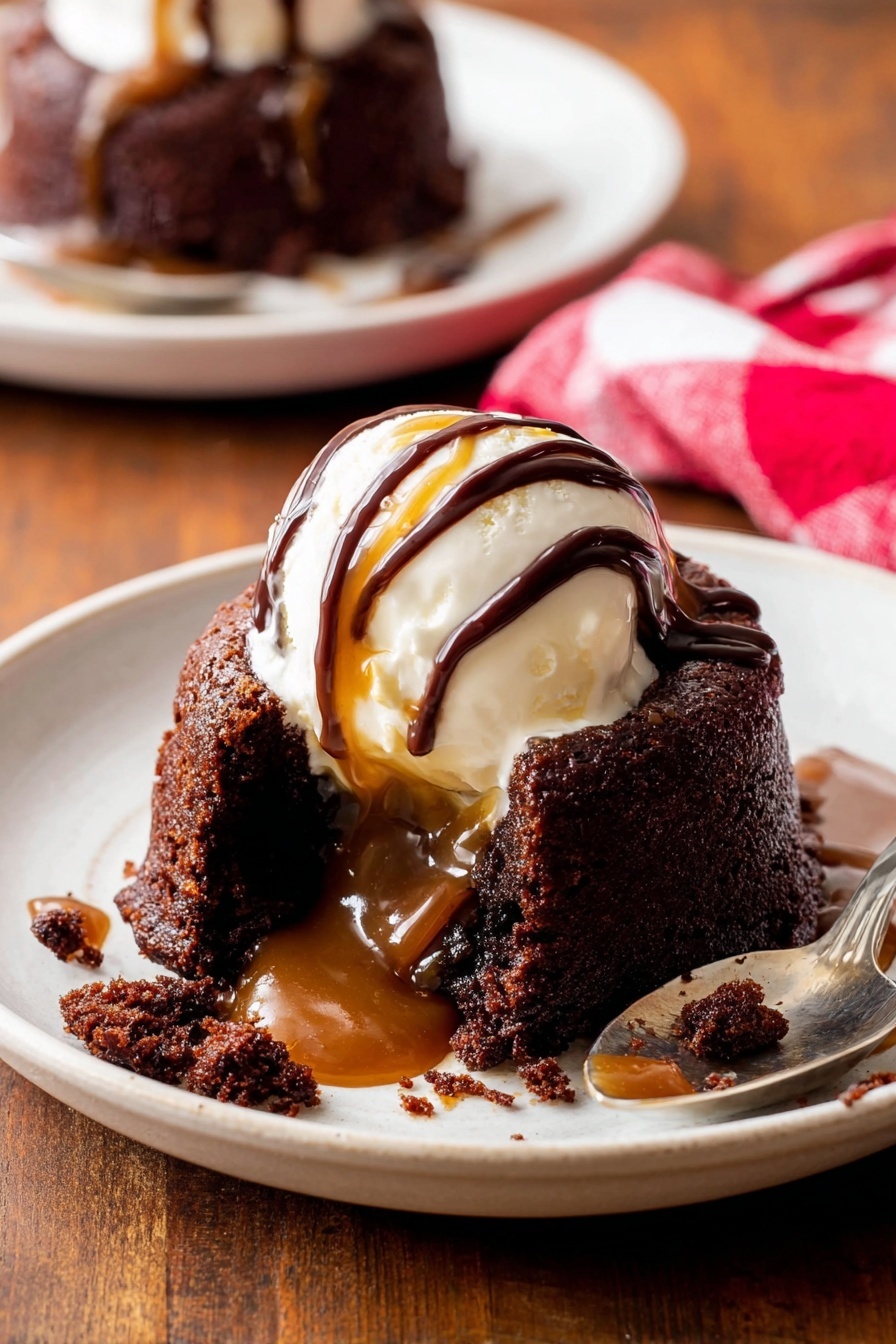
Garnishes
Serving these lava cakes with a scoop of vanilla ice cream is a classic that never fails. For an added touch, drizzle melted peanut butter and chocolate syrup on top to echo the rich fillings inside. A sprinkle of chopped roasted peanuts or a pinch of flaky sea salt can also add delightful texture and elevate the peanut flavor.
Side Dishes
Pair your Peanut Butter Chocolate Lava Cakes with fresh berries like raspberries or strawberries for a bright contrast. A simple mint sprig adds freshness and a pop of color. For a more indulgent experience, a small glass of rich coffee or milk complements the dessert’s richness beautifully.
Make Ahead and Storage
Storing Leftovers
If you have any leftovers (though they rarely stick around!), store the cakes in an airtight container in the refrigerator for up to 2 days. Keep in mind that the molten center will firm up once chilled.
Freezing
You can freeze these lava cakes before baking. After preparing and filling your ramekins, cover them tightly with plastic wrap and freeze for up to 1 month. When ready to enjoy, bake from frozen, adding a minute or two to the bake time as needed. This makes for a convenient last-minute dessert option!
Reheating
To warm refrigerated or thawed lava cakes, microwave each for about 20 to 30 seconds. Be careful not to overheat, or the molten center might cook through. For best results, reheat just until warm and gooey, then serve immediately.
Frequently Asked Questions:
It's best to stick with creamy commercial peanut butter like Jif or Skippy for this recipe. Natural or crunchy kinds often have different consistencies that affect the melting and texture, which may prevent the perfect gooey center.
Look for firm edges with a slightly soft and jiggly top. The baking time of 12 to 13 minutes at 425°F is designed to give you that delicate balance. The cakes will finish setting as they cool for one minute before inverting.
Absolutely! Just omit the peanut butter topping and bake for the same amount of time. You'll get a classic molten chocolate lava cake that’s just as lovely.
Yes! You can prepare the batter through step 6, cover it tightly, and refrigerate for up to one day. Let it come to room temperature before filling your ramekins and baking.
Final Thoughts
These Peanut Butter Chocolate Lava Cakes have become such a beloved treat in my home—and I hope they will in yours too! They’re the perfect balance of rich chocolate and creamy peanut butter, all wrapped in a tender cake that melts away on your tongue. Whether it’s for a special occasion or a cozy night in, this recipe is sure to bring smiles and satisfied taste buds. Remember, a little care in preparation goes a long way, but the real magic comes from sharing these warm delights with folks you love.
Print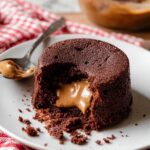
Peanut Butter Chocolate Lava Cakes Recipe
- Prep Time: 15 minutes
- Cook Time: 13 minutes
- Total Time: 35 minutes
- Yield: 4 cakes
- Category: Dessert
- Method: Baking
- Cuisine: American
- Diet: Vegetarian
Description
Indulge in these rich and gooey Peanut Butter Chocolate Lava Cakes, featuring a decadent molten chocolate center paired perfectly with creamy peanut butter. These individual-sized cakes are baked to perfection with a soft outer shell and a molten core, ideal for an impressive dessert that’s quick to prepare and perfect for sharing.
Ingredients
Chocolate Mixture
- 6 ounces semi-sweet chocolate
- ½ cup unsalted butter (8 Tbsp; 113g)
Dry Ingredients
- ¼ cup all-purpose flour (31g, spooned & leveled)
- ½ cup confectioners’ sugar (60g)
- ⅛ teaspoon salt
Eggs
- 2 large eggs
- 2 large egg yolks
Additional
- 8 teaspoons creamy peanut butter (42g, about 2 teaspoons per cake)
- Nonstick cooking spray
- Cocoa powder for dusting
- Optional for serving: ice cream, melted peanut butter, and/or chocolate syrup
Instructions
- Prepare Ramekins: Spray four 6-ounce ramekins lightly with nonstick cooking spray and dust the insides with cocoa powder to ensure easy release of the cakes after baking.
- Preheat Oven: Set your oven to 425 degrees Fahrenheit (218 degrees Celsius) to get it ready for baking.
- Melt Chocolate and Butter: Coarsely chop the semi-sweet chocolate. Place the unsalted butter in a microwave-safe bowl, add the chopped chocolate on top, and microwave in 10-second increments, stirring after each until the mixture is completely smooth. Set aside to cool slightly.
- Mix Dry Ingredients: In a small bowl, whisk together all-purpose flour, confectioners’ sugar, and salt until well combined.
- Combine Eggs: In another small bowl, whisk together the whole eggs and egg yolks until fully combined.
- Make Batter: Add the dry ingredient mixture and the eggs to the melted chocolate and butter bowl. Gently fold everything together using a silicone spatula or wooden spoon until smooth and slightly thick, removing any lumps by gently whisking.
- Fill Ramekins: Spoon the chocolate batter evenly into the prepared ramekins. Add 2 teaspoons of creamy peanut butter on top of each and gently press it down into the batter, leaving some exposed.
- Bake: Place the ramekins on a baking sheet and bake for 12 to 13 minutes until the edges appear firm but the tops are still slightly soft.
- Invert Cakes: Allow the cakes to cool for 1 minute. Then, carefully cover each ramekin with an inverted plate and turn over using oven mitts. The cakes should release easily from the ramekins.
- Serve: Serve immediately, topping with ice cream and drizzles of melted peanut butter and/or chocolate syrup if desired. Enjoy the melt-in-your-mouth lava cake experience.
Notes
- Make Ahead: The batter can be prepared through assembling and mixing up to step 6 ahead of time. Cover tightly and refrigerate for up to 1 day. Bring to room temperature before continuing to fill ramekins.
- Peanut Butter: Use commercial creamy peanut butter such as Jif or Skippy for best results. Avoid natural, crunchy, or other nut butters.
- Ramekins: 6-ounce oven-proof ramekins are recommended for optimal bake time and cake size. Muffin pans can be used as a substitute but will produce smaller cakes.
- Muffin Pan Alternative: Grease and dust 6 muffin cups, bake at 425°F for 8 to 10 minutes, then invert onto plates for serving.
- Plain Lava Cakes: To make without peanut butter, omit it entirely and bake for 12 to 13 minutes as directed.
- Careful when inverting the hot ramekins to avoid burns.
Nutrition
- Serving Size: 1 cake
- Calories: 450 kcal
- Sugar: 32 g
- Sodium: 120 mg
- Fat: 30 g
- Saturated Fat: 12 g
- Unsaturated Fat: 15 g
- Trans Fat: 0 g
- Carbohydrates: 38 g
- Fiber: 3 g
- Protein: 7 g
- Cholesterol: 125 mg
Leave a Reply