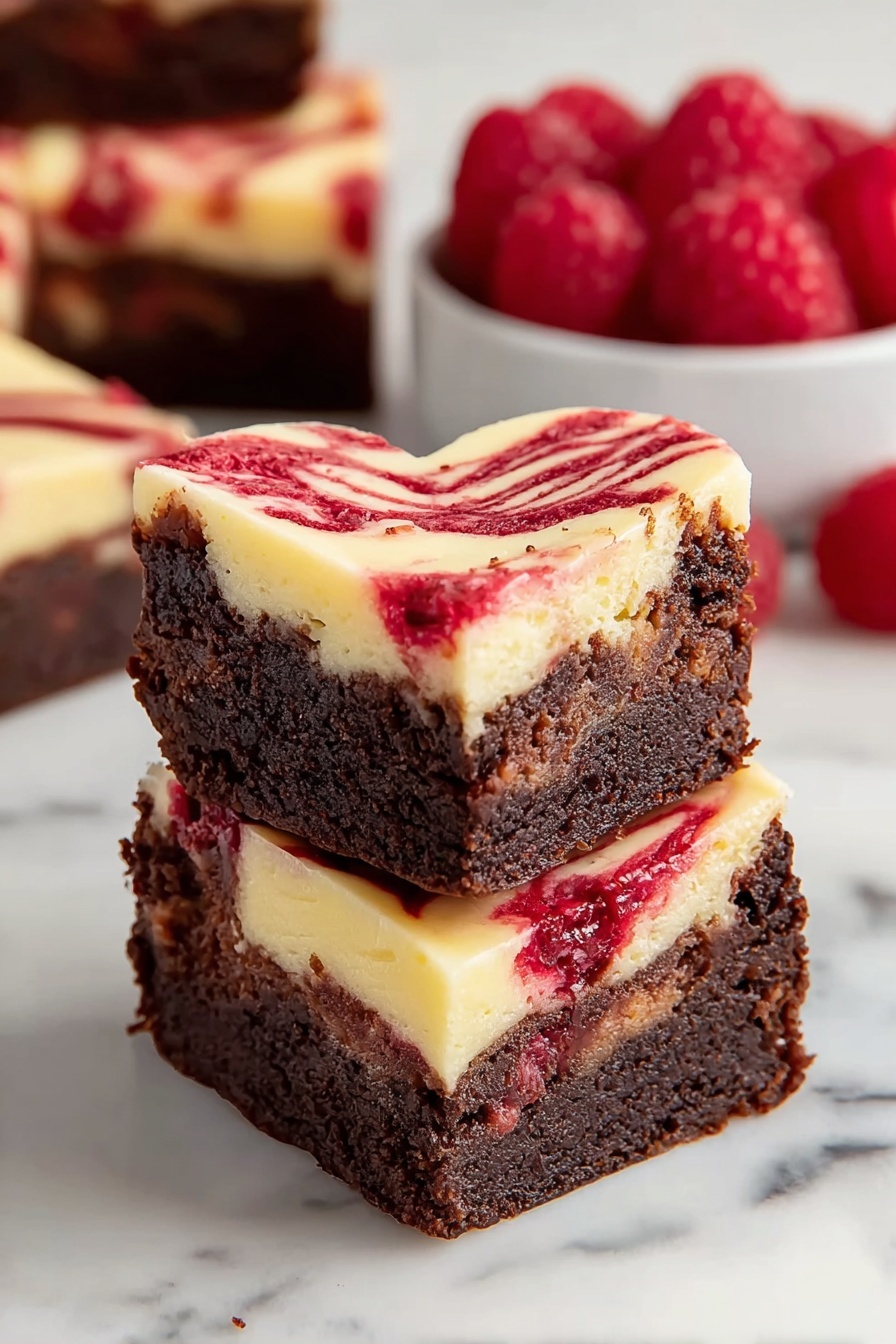
If you’re craving a dessert that’s as charming as it is delicious, you’re going to love this Heart-Shaped Raspberry Cheesecake Brownies Recipe. Imagine fudgy chocolate brownies topped with creamy cheesecake and a tangy raspberry swirl—all shaped into adorable hearts. Let me show you how to make these beauties!

Jump to:
- Why You'll Love This Recipe
- Ingredients & Why They Work
- Make It Your Way
- Step-by-Step: How I Make Heart-Shaped Raspberry Cheesecake Brownies Recipe
- Top Tip
- How to Serve Heart-Shaped Raspberry Cheesecake Brownies Recipe
- Make Ahead and Storage
- Frequently Asked Questions:
- Final Thoughts
- Heart-Shaped Raspberry Cheesecake Brownies Recipe
Why You'll Love This Recipe
I’ve made these heart-shaped raspberry cheesecake brownies several times now, and every time they steal the show—whether it’s a Valentine’s Day treat or just a cozy night in. The layers and flavors come together so perfectly!
- Decadently layered: Rich cocoa brownies meet luscious cheesecake and bright raspberry for a perfect balance.
- Perfect for gifting: Cut into heart shapes, they’re irresistibly cute and ideal for sharing.
- Simple ingredients: Made mostly pantry staples with fresh raspberries to brighten the flavor.
- Versatile and vegetarian: Great for any occasion and friendly for vegetarian diets.
Ingredients & Why They Work
When gathering your ingredients, look for fresh or quality frozen raspberries and room-temperature dairy for the smoothest cheesecake topping. Using Dutch-process cocoa powder really deepens the chocolate flavor in the brownies.
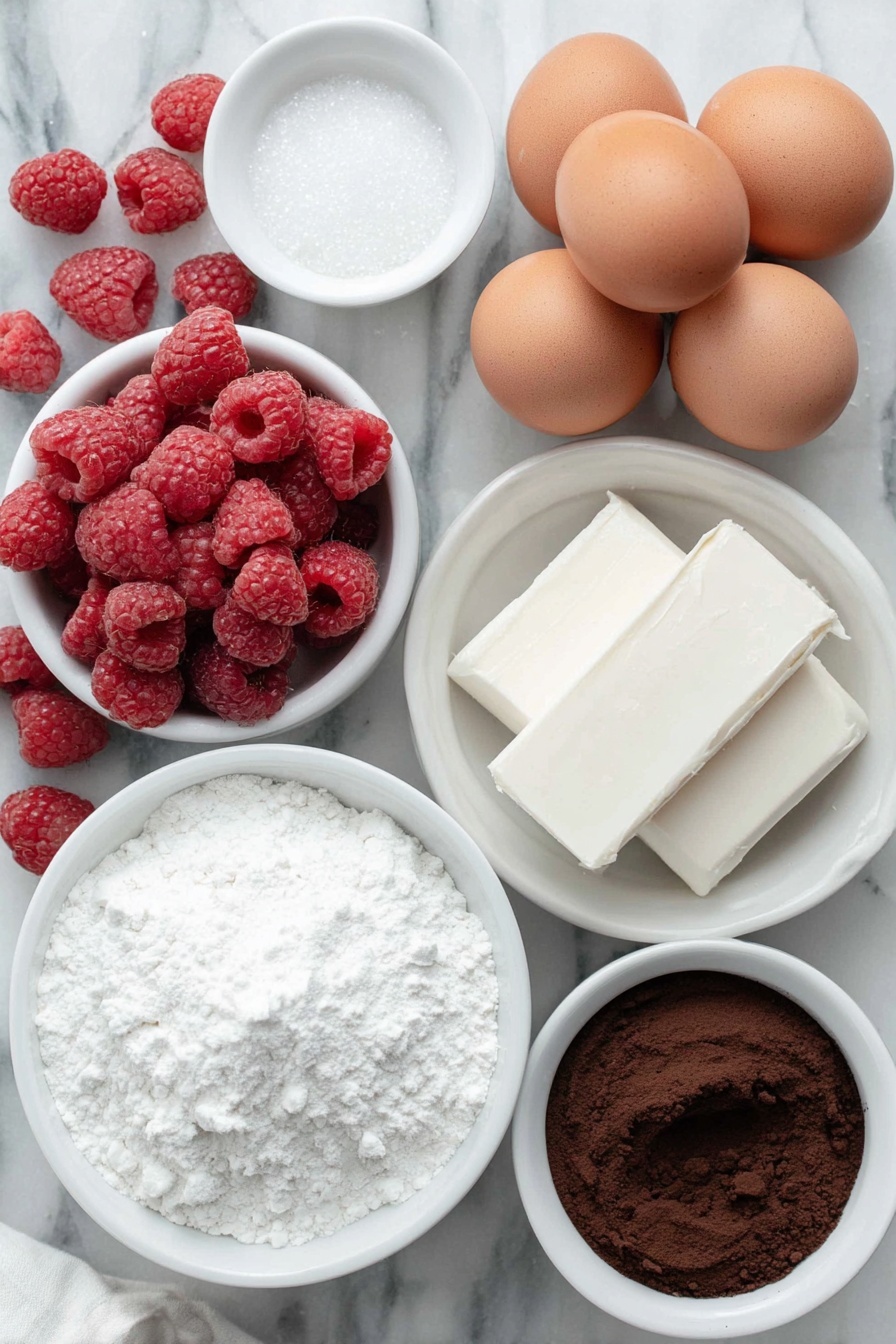
- Raspberries: Opt for fresh if possible, or thawed frozen raspberries to make a naturally tart and vibrant sauce.
- Granulated sugar: Provides sweetness in the raspberry sauce, cheesecake layer, and brownie batter.
- Vanilla extract: Adds warmth and depth to each component.
- Cream cheese: Use full-fat and room temperature for a creamy, smooth cheesecake layer.
- Eggs: Room temperature eggs whip up better in both the cheesecake and brownie mixtures for lightness and structure.
- All-purpose flour (or gluten-free blend): Forms the base of the brownie, choose gluten-free if needed.
- Dutch-process cocoa powder: Sifted for no lumps, it delivers intense chocolate flavor with a smooth texture.
- Salt: Enhances all the flavors and balances the sweetness.
- Refined coconut oil or neutral oil: Keeps the brownies moist with a subtle flavor that doesn’t overpower.
Make It Your Way
One of the joys of the Heart-Shaped Raspberry Cheesecake Brownies Recipe is how easy it is to personalize. Whether you want to switch up flavors, accommodate dietary needs, or experiment with presentation, these variations let you make this dessert truly your own.
- Gluten-Free Version: I swapped the all-purpose flour for a gluten-free blend and was surprised by how well the brownies held together—still fudgy with a creamy topping. It’s a fantastic option for guests with gluten sensitivities without sacrificing flavor.
- Vegan Adaptation: While I haven’t tried fully vegan yet, replacing the cream cheese with a plant-based alternative and using flax eggs instead of regular eggs could work beautifully. Plus, coconut oil makes it easy to keep things plant-based.
- Fruit Variations: Don’t limit yourself to raspberries! Blueberries, strawberries, or even a mixed berry sauce make delightful swirls. I once tried a blueberry sauce, and the contrast with dark cocoa was incredible.
- Spice it Up: Adding a pinch of cinnamon or a dash of cayenne pepper to the brownie batter adds a subtle warmth that pairs wonderfully with the tangy raspberry swirl. It’s a fun twist if you're feeling adventurous.
- Festive Toppings: After baking and chilling, try sprinkling crushed pistachios or edible gold flakes on the top before cutting. It makes the hearts extra special for celebrations like Valentine’s Day.
Step-by-Step: How I Make Heart-Shaped Raspberry Cheesecake Brownies Recipe

Step 1: Crafting the Bright, Tangy Raspberry Sauce
Start by placing 1 cup of raspberries, 1 tablespoon of granulated sugar, and 1 teaspoon of vanilla extract into a saucepan over medium heat. As the mixture warms, you’ll notice the berries breaking down, releasing their vibrant juices. Let it gently simmer for about 8 minutes — the sauce will thicken noticeably and become beautifully fragrant. After simmering, strain it carefully through a fine mesh sieve to remove all seeds, leaving you with a smooth, glossy sauce. Set it aside to cool; this raspberry sauce is what gives the brownies their signature tart swirl that contrasts wonderfully with the creamy cheesecake.
Step 2: Whipping Up the Creamy Cheesecake Layer
To get that luscious cheesecake layer, begin by beating 8 ounces of room-temperature cream cheese with ⅓ cup granulated sugar until you achieve a silky-smooth texture. It should feel light and fluffy under your beaters—no lumps in sight. Then beat in 1 large room-temperature egg and ½ teaspoon vanilla extract until everything is fully blended and creamy. This layer creates the perfect balance to the rich brownie base and the tart raspberry sauce above it, so don’t rush this step—smooth and creamy is the goal!
Step 3: Mixing Your Dry Ingredients With Cocoa Love
In a separate bowl, whisk together 1 cup of all-purpose flour (or gluten-free blend), ¾ cup sifted Dutch-process cocoa powder, and ¼ teaspoon salt. Whisking helps evenly distribute the cocoa and salt, ensuring every bite of brownie is perfectly balanced. This blend will give the brownies that deep chocolate flavor and tender crumb you crave.
Step 4: Creating the Rich Brownie Batter
In another large bowl, combine ¾ cup plus 2 tablespoons of refined coconut oil with 1 ½ cups granulated sugar and 1 tablespoon vanilla extract. Stir well till evenly incorporated. Then, add 3 large room-temperature eggs one at a time, beating thoroughly after each addition. You’ll notice the mixture becoming glossy and thicker — a good sign that air is being incorporated for a fudgy texture.
Step 5: Bringing It All Together Without Overmixing
Next, gradually blend your dry cocoa-flour mix into the wet brownie mixture, stirring just until combined. The key here? Be gentle — too much mixing can make the brownies tough. You’re aiming for a rich, thick batter with no flour streaks but still tender and fudgy once baked.
Step 6: Assembling the Layers With Love
Line your baking pan with parchment paper for an easy release later. Spread the freshly mixed brownie batter evenly across the bottom of the pan, using a spatula to smooth it out. Next, pour the creamy cheesecake mixture over the brownie layer, spreading gently so you don’t blend the two layers too much. Finally, spoon the cooled raspberry sauce over the cheesecake layer in dollops. Take a skewer or toothpick and swirl it delicately across the surface to create a beautiful marbled pattern—this swirl is what makes these brownies so special and eye-catching.
Step 7: Baking to Perfection
Preheat your oven to 350°F (175°C). Place the assembled brownies in the oven and bake for 35 minutes. You’re looking for a firm top with just a slight jiggle in the center. When a toothpick inserted near the middle comes out with moist crumbs (but not wet batter), it’s time to take them out. The aroma of chocolate blended with creamy cheesecake and fresh raspberry will fill the air—pure bliss!
Step 8: Cooling and Chilling for the Perfect Set
Allow the brownies to cool completely on your countertop—this helps the layers settle without cracking. Once cooled, refrigerate the pan for 2 full hours; chilling is crucial for setting that cheesecake layer firmly, so the brownies hold their heart shapes beautifully when cut.
Step 9: The Final Touch—Cutting and Serving
After chilling, lift the brownies out using the parchment paper edges. Using a heart-shaped cookie cutter, press firmly to cut out charming heart-shaped brownies. These can be enjoyed chilled right from the fridge or brought to room temperature for a softer mouthfeel. Either way, each bite delivers a delightful combination of rich chocolate, creamy cheesecake, and bright raspberry. Perfect for sharing or savoring all to yourself!
Top Tip
Getting these Heart-Shaped Raspberry Cheesecake Brownies just right is all about the little details. Here are some helpful tips that truly made my baking process smoother and the final dessert even more impressive!
- Use Room Temperature Ingredients: Bringing your cream cheese and eggs to room temperature ensures the cheesecake layer mixes smoothly without lumps, giving you that perfect creamy texture.
- Strain the Raspberry Sauce Thoroughly: Removing the seeds from the raspberry sauce makes the swirls in your brownie silky and seed-free — trust me, it feels so much better on the palate!
- Chill Before Cutting: After baking and cooling, chilling the brownies for 2 hours firm up the cheesecake layer, which helps when cutting those neat, distinct heart shapes without smudging.
- Don’t Overmix the Brownie Batter: Just combine the dry and wet ingredients until blended to keep the brownies tender and cakey, avoiding a dense or tough texture.
How to Serve Heart-Shaped Raspberry Cheesecake Brownies Recipe
Garnishes
To make your Heart-Shaped Raspberry Cheesecake Brownies even more irresistible, try garnishing with fresh whole raspberries or a light dusting of powdered sugar. A few mint leaves add a lovely pop of color and freshness. If you want an extra touch of indulgence, drizzle with melted white chocolate or a little extra raspberry sauce right before serving.
Side Dishes
These brownies pair wonderfully with a scoop of vanilla bean ice cream or a dollop of lightly whipped cream to balance the richness. For a cozy touch, serve with a cup of freshly brewed coffee or a glass of cold milk. If you’re celebrating a special occasion, a glass of sparkling rosé or a fruity dessert wine complements the raspberry and chocolate flavors beautifully.
Make Ahead and Storage
Storing Leftovers
Store your Heart-Shaped Raspberry Cheesecake Brownies in an airtight container in the refrigerator for up to 4 days. Keeping them chilled preserves the creamy cheesecake layer and the vibrant raspberry flavor beautifully. Just make sure to keep them covered to prevent the brownies from drying out.
Freezing
If you want to make these brownies ahead of time or save extras for later, freezing is a great option! Place the cut heart-shaped brownies in a single layer on a baking sheet and freeze until firm, then transfer them to a freezer-safe bag or container. They can be frozen for up to 2 months. Thaw in the refrigerator overnight before serving for the best texture.
Reheating
While these brownies are delicious chilled or at room temperature, if you prefer a slightly warmed treat, gently microwave a single brownie for about 10-15 seconds. Avoid overheating as it can melt the cheesecake layer and affect the texture.
Frequently Asked Questions:
Absolutely! Frozen raspberries work perfectly—just thaw them first before simmering to create your raspberry sauce.
If you don’t have Dutch-process cocoa, natural cocoa powder can be substituted, but it may alter the flavor slightly, making it a bit more acidic and sharper in taste.
After spooning the raspberry sauce onto the cheesecake layer, use a skewer or toothpick to gently swirl the sauce in a back-and-forth motion without blending too much, creating beautiful marble patterns.
Yes! Just swap the all-purpose flour with a gluten-free blend and ensure your cocoa powder and other ingredients are certified gluten-free. The texture and taste will still be rich and delicious.
Final Thoughts
Making the Heart-Shaped Raspberry Cheesecake Brownies Recipe is such a joyful baking adventure and a wonderful way to share love through food. Each bite offers layers of chocolate richness, creamy cheesecake, and bright raspberry tang that’s simply unforgettable. Whether for Valentine’s Day or any special moment, these brownies bring smiles and sweet moments to the table. I hope you enjoy creating and savoring this treat as much as I do!
Print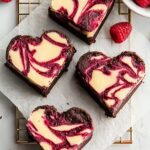
Heart-Shaped Raspberry Cheesecake Brownies Recipe
- Prep Time: 25 minutes
- Chilling Time: 2 hours
- Cook Time: 35 minutes
- Total Time: 3 hours
- Yield: 9 hearts
- Category: Dessert
- Method: Baking
- Cuisine: American
- Diet: Vegetarian
Description
Delight in these luscious Heart Shaped Brownies featuring a rich chocolate base, creamy cheesecake topping, and a vibrant raspberry swirl. Perfect for Valentine’s Day or any special occasion, these brownies combine layers of intense cocoa flavor with a tart raspberry sauce and smooth cheesecake for a beautifully decadent dessert.
Ingredients
Raspberry Sauce
- 1 cup raspberries (fresh or thawed frozen)
- 1 tablespoon granulated sugar
- 1 teaspoon vanilla extract
Cheesecake Layer
- 8 oz cream cheese, room temperature
- ⅓ cup granulated sugar
- 1 large egg, room temperature
- ½ teaspoon vanilla extract
Brownie Batter
- 1 cup all-purpose flour (or gluten-free blend)
- ¾ cup Dutch-process cocoa powder, sifted
- ¼ teaspoon salt
- ¾ + 2 tablespoon cup refined coconut oil or neutral oil
- 1 ½ cups granulated sugar
- 1 tablespoon vanilla extract
- 3 large eggs, room temperature
Instructions
- Prepare Raspberry Sauce: In a saucepan over medium heat, combine raspberries, 1 tablespoon sugar, and 1 teaspoon vanilla extract. Simmer for 8 minutes or until the mixture thickens. Strain through a fine mesh to remove seeds, then set aside to cool.
- Mix Cheesecake Layer: Beat room-temperature cream cheese with ⅓ cup sugar until smooth and creamy. Add 1 egg and ½ teaspoon vanilla extract, mixing until fully combined and creamy.
- Combine Dry Ingredients: In a bowl, whisk together flour, cocoa powder, and salt until evenly mixed.
- Prepare Brownie Wet Ingredients: In another bowl, mix the refined coconut oil, 1 ½ cups sugar, and 1 tablespoon vanilla extract. Add eggs one at a time, beating well after each addition.
- Mix Brownie Batter: Gradually blend the dry ingredients into the wet mixture just until combined; avoid overmixing.
- Assemble: Line a baking pan with parchment paper. Spread the brownie batter evenly in the pan. Pour the cheesecake mixture over the brownie layer. Spoon the raspberry sauce over the top and gently swirl with a skewer or toothpick to create a marbled effect.
- Bake the Brownies: Preheat the oven to 350 degrees Fahrenheit. Bake for 35 minutes or until a toothpick inserted near the center comes out with moist crumbs.
- Cool and Chill: Allow the brownies to cool completely at room temperature. Once cooled, refrigerate the pan for 2 hours to set the cheesecake layer.
- Serve: Remove from refrigerator, cut into heart shapes using a cookie cutter, and serve chilled or at room temperature.
Notes
- Use room-temperature cream cheese and eggs for a smooth, creamy cheesecake layer.
- Strain the raspberry sauce to remove all seeds, ensuring a smooth texture.
- Chill the brownies completely before cutting to achieve clean, distinct heart shapes.
- You can substitute refined coconut oil with any neutral oil like canola or vegetable oil.
- For gluten-free version, use a gluten-free all-purpose flour blend instead of regular flour.
Nutrition
- Serving Size: 1 heart
- Calories: 350 kcal
- Sugar: 28 g
- Sodium: 110 mg
- Fat: 18 g
- Saturated Fat: 8 g
- Unsaturated Fat: 9 g
- Trans Fat: 0 g
- Carbohydrates: 42 g
- Fiber: 3 g
- Protein: 4 g
- Cholesterol: 65 mg


Leave a Reply