Let me share one of my all-time favorite desserts that feels both fancy and comforting: a Creamy Vanilla Crème Brûlée Recipe. It’s that luscious vanilla custard with a crisp caramelized sugar topping that cracks perfectly with every spoonful—trust me, you’re going to love it.

Jump to:
Why You'll Love This Recipe
I adore this crème brûlée because it’s incredibly elegant yet surprisingly simple to make. Once you get the hang of the water bath and torching technique, you’ll never want to buy it at a restaurant again.
- Silky Texture: The custard comes out smooth and velvety thanks to gentle baking in a warm water bath.
- Real Vanilla Flavor: Infusing the cream with fresh vanilla bean makes a huge difference in depth and aroma.
- Perfect Crust: That caramelized sugar layer cracks beautifully every time when torched just right.
- Make Ahead Friendly: You can prepare it a day ahead and simply brûlée right before serving.
Ingredients & Why They Work
For a silky custard with that signature crack, quality ingredients and the right tools matter. Here's a quick overview to help guide your shopping, especially if you want to impress friends with your crème brûlée skills.
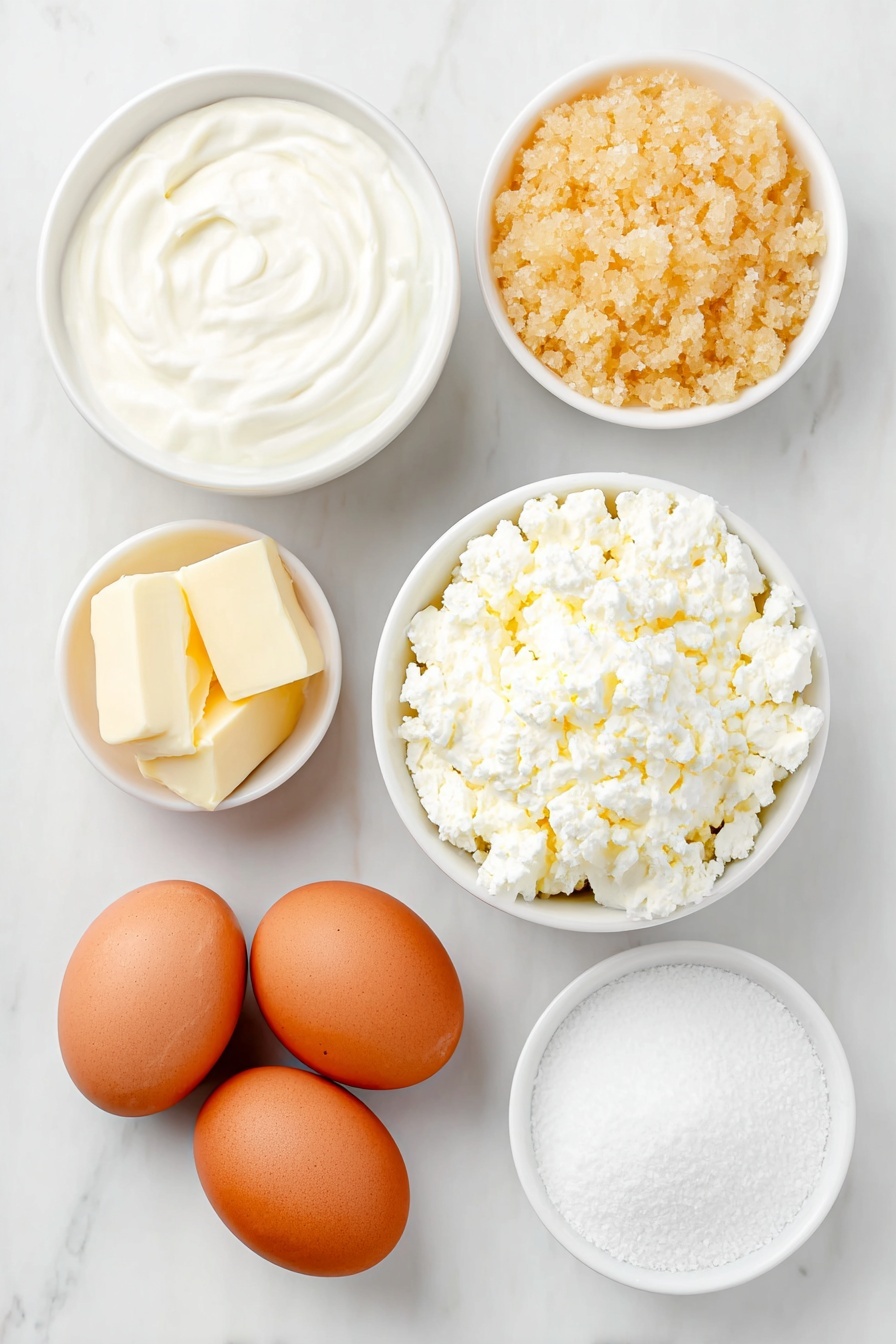
- Heavy Cream: Provides the rich, creamy base that gives the custard its luscious mouthfeel.
- Granulated Sugar: Used both to sweeten the custard and to form that irresistible brûlée crust on top.
- Kosher Salt: A tiny pinch balances the sweetness and heightens the vanilla flavor.
- Vanilla Bean: Scraped seeds add the deep, natural vanilla notes you want—much better than extract alone.
- Egg Yolks and Egg: These are the stars for binding the custard and creating that silky texture without curdling.
- Vanilla Extract: A final boost of vanilla flavor that complements the bean infusion beautifully.
Make It Your Way
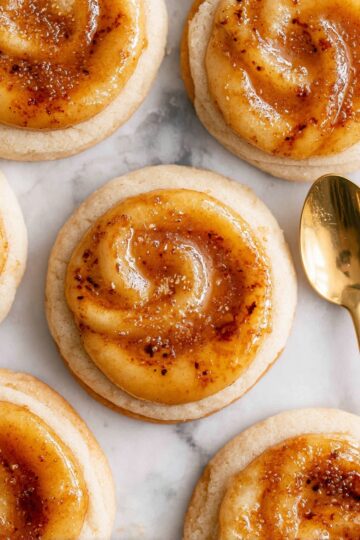
The Creamy Vanilla Crème Brûlée Recipe is a beautiful canvas for your creativity. Don’t hesitate to tailor it to your taste or dietary preferences — the classic flavor is wonderful, but a few tweaks can make it truly your own.
- Almond Bliss: I once swapped the vanilla bean for almond extract for a nutty twist. Just a few drops elevated the custard with a cozy, aromatic note — perfect for cozy fall evenings.
- Mocha Magic: Adding a hint of coffee extract turned the crème brûlée into a decadent mocha delight. It’s my go-to when I want a coffeehouse vibe at home.
- Peppermint Twist: For a festive touch, especially around the holidays, a splash of peppermint extract adds a refreshing coolness that contrasts beautifully with the rich custard.
- Dairy-Free Variation: Substitute heavy cream with full-fat coconut milk and ensure your sugar is vegan-friendly. The custard’s creamy texture stays intact, with a subtle coconut undertone that is just divine.
Step-by-Step: How I Make Creamy Vanilla Crème Brûlée Recipe
Step 1: Preheat and Prepare Your Oven
Start by preheating your oven to 325°F — the perfect gentle heat for the water bath baking method essential to this custard. This slow, careful baking gives you that decadent, silky texture without curdling or cracking. Trust me, it’s worth the wait!
Step 2: Infuse the Cream with Vanilla Bean
In a small saucepan, combine 2 cups of heavy cream, half of the granulated sugar (about 2 ½ tablespoons), ¼ teaspoon kosher salt, and your scraped ½ vanilla bean pod. Bring the mixture just to a boil — you’ll see little bubbles forming around the edges and smell that warming vanilla aroma fill your kitchen. Remove from heat promptly to avoid overcooking.
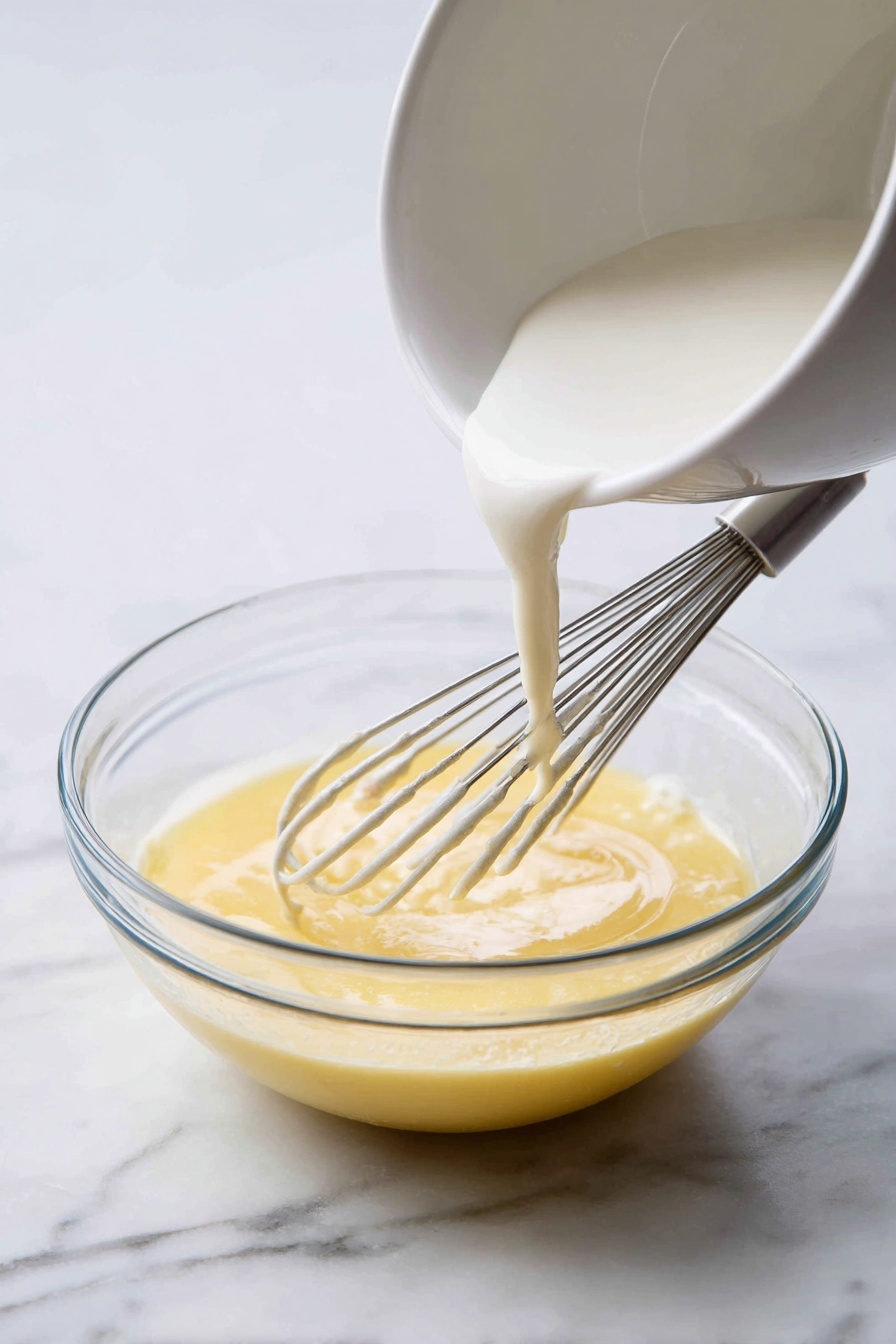
Step 3: Whisk Eggs and Sugar to a Blanched Mixture
While your cream is heating, whisk together 1 egg yolk, 1 large egg, and the remaining sugar until the mixture lightens slightly and looks a bit frothy. This blanchir step may sound fancy, but it’s simply key for a smooth custard texture — and it’s pretty satisfying to see your mixture brighten before your eyes.
Step 4: Temper the Eggs Gently
Slowly pour a small amount of the hot cream into the egg mixture while whisking constantly. This tempering prevents the eggs from scrambling. Then gradually add the rest of the cream, stirring continuously. To keep things steady, I like setting the bowl on a kitchen towel during this step — it prevents slipping and lets you whisk confidently.
Step 5: Strain and Portion Your Custard
Skim off any foam on top and remove the vanilla bean pod. Use a fine mesh strainer to pour the custard into six 3-ounce ramekins evenly — a kitchen scale can be super helpful to make sure every serving is just right. Even portions mean they bake evenly, resulting in consistent silky texture across all your ramekins.
Step 6: Set Up the Water Bath and Bake
Place your ramekins in a large, deep baking dish. Cover with foil but leave a corner open so you can peek at the custards. Carefully pour hot water into the dish until it reaches halfway up the ramekins, avoiding splashes into the custard. This water bath gently surrounds your custard with steam, baking it evenly. Bake for 25 minutes — the centers should jiggle softly but not be liquid, like a delicate wobbly jelly.
Step 7: Cool, Chill, and Prepare for Torching
Use tongs or a spatula with a towel to carefully remove the ramekins from the water bath. Let them cool to room temperature, then cover with plastic wrap and refrigerate for at least 2 hours, or better yet, overnight. This chilling step is crucial — it firms up the custard so that when you torch your sugar topping, it cracks perfectly and won’t crackle through the custard itself.
Step 8: Sprinkle Sugar and Torch to Perfection
Right before serving, evenly sprinkle about ½ tablespoon of granulated sugar over each custard’s surface. Tilt the ramekin gently to coat with a thin, shimmering sugar layer where you can still see the custard beneath. Using a kitchen torch, start melting the sugar from a distance with a low flame, then increase heat gradually until you see a deep golden caramel forming. Be patient and careful — burnt sugar can ruin all your hard work!
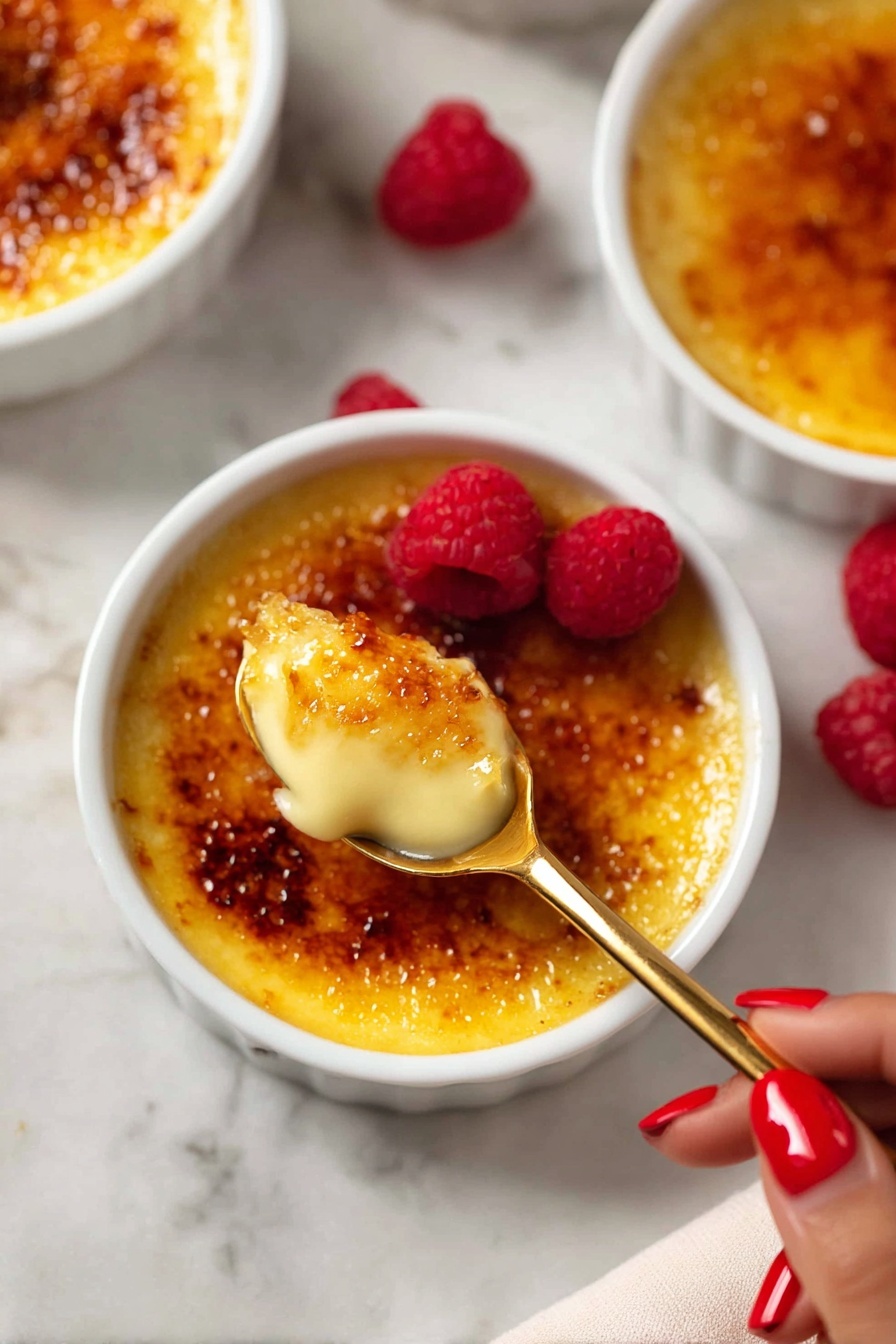
Step 9: Let Your Crust Set and Serve
Give your caramelized crust about 3 minutes to cool and harden. The moment you hear that delightful crackle when you break through the surface with your spoon is pure magic. Serve immediately and savor every creamy, crunchy bite of your homemade classic French dessert.
Top Tip
Mastering the perfect Creamy Vanilla Crème Brûlée Recipe can seem daunting, but these insider tips will help ensure your custard is silky smooth and your caramelized sugar crust cracks just right every time.
- Tempering Eggs Properly: I always place a kitchen towel under my mixing bowl when whisking hot cream into eggs. It keeps the bowl stable and prevents scrambling the eggs, which is key for a smooth custard.
- Even Portioning: Using a kitchen scale to divide your custard evenly among ramekins helps guarantee consistent baking, so you don’t end up with half-set or overcooked portions—trust me, it makes a difference!
- Water Bath Watch: Make sure the water comes halfway up the ramekins without splashing inside. I learned the hard way that even a tiny splash can ruin the custard’s texture.
- Timing the Torch: Torch the sugar topping right before serving for the best crackle. I’ve found that chilling the custards overnight strengthens the crust and makes the caramelizing process easier and more rewarding.
How to Serve Creamy Vanilla Crème Brûlée Recipe
Garnishes
To elevate your crème brûlée, consider garnishing with fresh berries like raspberries or blueberries for a tart contrast to the creamy sweetness. A light dusting of finely chopped toasted nuts—such as pistachios or almonds—adds lovely texture. For a touch of elegance, a small sprig of fresh mint or a delicate edible flower can make the presentation truly stunning.
Side Dishes
Serve your crème brûlée alongside lightly sweetened whipped cream or a crisp fruit salad for balance. A petite cookie like a tuile or biscotti pairs wonderfully, adding a satisfying crunch without overpowering the rich custard. If you’re aiming for a festive dinner, a glass of late harvest dessert wine complements the vanilla and caramel notes beautifully.
Make Ahead and Storage
Storing Leftovers
Leftover crème brûlée should be stored tightly covered in the refrigerator for up to 1 week. Make sure the custards are cooled to room temperature before wrapping them with plastic wrap or placing them in an airtight container. This keeps the custard fresh and silky, waiting for you to torch the sugar topping just before serving again.
Freezing
While freezing crème brûlée isn’t ideal because it can affect the texture of the custard and the crispness of the sugar topping, you can freeze the custard portion before brûléeing. Pour the prepared custard into ramekins, cover well, and freeze for up to 1 month. When ready to enjoy, thaw overnight in the refrigerator and caramelize the sugar topping right before serving.
Reheating
Because crème brûlée is best served cold with a warm caramelized top, avoid reheating the custard itself. Instead, if you have stored brûléed custards, you can briefly use a kitchen torch to melt and crisp the sugar topping once more just before serving to refresh that signature crackle. If you need the custard a little softer, let it sit at room temperature for 10-15 minutes before torching.
Frequently Asked Questions:
Yes! While fresh vanilla bean adds an extra layer of fragrance and speckled beauty to your custard, a good-quality vanilla extract can be substituted. Use 1 teaspoon of vanilla extract as directed to maintain that lovely vanilla flavor.
No worries! You can make dry caramel by melting sugar in a pot over medium-high heat until amber colored, then carefully pour it over your chilled custards. It creates a thicker crust but still delicious. Just be very careful as caramel can burn quickly.
The custard should gently jiggle in the center but not be liquid. You can place a small spoon on top, and if it holds its weight without sinking, the custard is perfectly set. This gentle jiggle means it will be silky smooth when chilled.
Absolutely! In fact, chilling the custards overnight before torching the sugar topping improves the texture and makes caramelizing easier. Just cover your cooled ramekins with plastic wrap and refrigerate for at least 2 hours or up to 1 week.
Final Thoughts
There’s something truly magical about cracking through that glossy, caramelized sugar crust to reveal a luscious, velvety vanilla custard beneath. This Creamy Vanilla Crème Brûlée Recipe invites you to slow down and savor each spoonful—a perfect ending to any meal or a special treat just for yourself. With just a few helpful tips and a little patience, you’ll be creating elegant, crowd-pleasing desserts that taste as wonderful as they look. Happy cooking and happy indulging!
Print
Creamy Vanilla Crème Brûlée Recipe
- Prep Time: 15 minutes
- Cooling Time: 2 hours
- Cook Time: 25 minutes
- Total Time: 2 hours 40 minutes
- Yield: 6 servings
- Category: Dessert
- Method: Baking
- Cuisine: French
- Diet: Vegetarian
Description
This classic crème brûlée recipe features a velvety vanilla custard topped with a crisp, caramelized sugar crust. By infusing heavy cream with fresh vanilla bean and using a gentle water bath baking method, the rich custard develops a silky texture. The finishing touch is a perfectly torched sugar layer that cracks delightfully with each spoonful, offering an elegant dessert perfect for any occasion.
Ingredients
Custard
- 2 cups heavy cream
- ⅓ cup granulated sugar, divided
- ¼ teaspoon kosher salt
- ½ vanilla bean, scraped
- 1 egg yolk
- 1 large egg
- 1 teaspoon vanilla extract
Caramelized Sugar Topping
- ¼ cup granulated sugar, for brûlée
Instructions
- Preheat Oven: Preheat your oven to 325 degrees Fahrenheit to prepare for the water bath baking.
- Heat Cream Mixture: In a small saucepan, combine heavy cream, half of the granulated sugar (about 2 ½ tablespoons), kosher salt, and the split, scraped vanilla bean. Bring the mixture just to a boil, then remove from heat.
- Whisk Eggs and Sugar: While the cream heats, vigorously whisk together the egg yolk, large egg, and remaining sugar until the mixture lightens slightly, a technique known as blanchir.
- Temper Eggs: Slowly add a small amount of the hot cream into the egg mixture while whisking constantly to temper the eggs, then gradually add all remaining cream, stirring continuously to prevent curdling.
- Strain and Divide Custard: Skim off any foam from the cream mixture. Remove the vanilla bean pod. Pour the custard evenly into six 3-ounce ramekins, using a kitchen scale or measuring cup to ensure uniform portions.
- Prepare Water Bath: Place ramekins in a deep baking dish. Cover the dish with foil, leaving a corner open to watch the custards. Carefully pour hot water into the dish until it reaches halfway up the ramekins, being careful not to splash water into the custards.
- Bake Custards: Bake for 25 minutes until the centers gently jiggle but are set. A small spoon resting on top should hold its weight, or rely on the jiggle test.
- Cool and Chill: Remove ramekins carefully from the water bath. Cool to room temperature, then cover with plastic wrap and refrigerate for at least 2 hours or preferably overnight for best texture and easier torching.
- Apply Sugar Topping: When ready to serve, evenly sprinkle about half a tablespoon of granulated sugar over each custard surface. Tilt ramekins to coat the top with a thin, even layer of sugar, ensuring custard remains visible beneath.
- Caramelize Sugar: Using a kitchen torch, melt the sugar starting from a distance with a low flame and gradually intensify until a dark golden caramel crust forms. Be cautious to avoid burning.
- Set and Serve: Allow the caramelized crust to cool and harden for about 3 minutes before serving immediately to enjoy the perfect crackle.
Notes
- If you lack a kitchen torch, make dry caramel by heating 1 cup sugar in a pot over medium-high heat until melted and amber colored. Pour carefully over chilled custards for a thicker crust.
- Flavor variations include swapping vanilla bean with almond, coffee, or peppermint extracts; add these cautiously as extracts vary in strength.
- Best results come from torching the sugar topping immediately before serving for a crisp crackle.
- Store crème brûlée tightly covered in the refrigerator for up to 1 week. Cool to room temperature before refrigerating.
- Use a kitchen towel under the mixing bowl while tempering eggs for stability.
Nutrition
- Serving Size: 1 ramekin (3 oz)
- Calories: 320 kcal
- Sugar: 28 g
- Sodium: 45 mg
- Fat: 22 g
- Saturated Fat: 14 g
- Unsaturated Fat: 7 g
- Trans Fat: 0 g
- Carbohydrates: 27 g
- Fiber: 0 g
- Protein: 5 g
- Cholesterol: 170 mg


Leave a Reply