There’s something truly comforting about a rich, velvety gravy made from your own turkey drippings—it’s the kind of flavor that turns a meal into a memory. This Homemade Turkey Gravy from Drippings Recipe captures that golden goodness perfectly, giving you all the savory depth you want without any fuss.

Jump to:
- Why You'll Love This Recipe
- Ingredients & Why They Work
- Make It Your Way
- Step-by-Step: How I Make Homemade Turkey Gravy from Drippings Recipe
- Top Tip
- How to Serve Homemade Turkey Gravy from Drippings Recipe
- Make Ahead and Storage
- Frequently Asked Questions:
- Final Thoughts
- Homemade Turkey Gravy from Drippings Recipe
Why You'll Love This Recipe
I’ve made gravies from scratch for years, and honestly, the homemade versions made from turkey drippings never fail to impress. This recipe is straightforward, uses ingredients you likely already have, and rewards you with that rich, deep flavor you just can’t beat in a jarred sauce.
- Pure flavor: Using the actual drippings means the gravy carries the essence and seasoning of your roasted turkey—it’s like magic in a pan.
- No lumps guaranteed: The recipe’s roux technique and constant whisking ensure you get silky smooth gravy every single time.
- Flexible seasoning: You get to adjust herbs and salt to your liking, making this gravy uniquely yours without complicated steps.
- Great for leftovers: The gravy stores, freezes, and reheats wonderfully—perfect if you’re planning ahead or have extra turkey.
Ingredients & Why They Work
These simple ingredients come together to create a traditional gravy that’s full of body and flavor. Each ingredient has its role—from the butter that builds richness to the flour that creates the perfect thickening base.
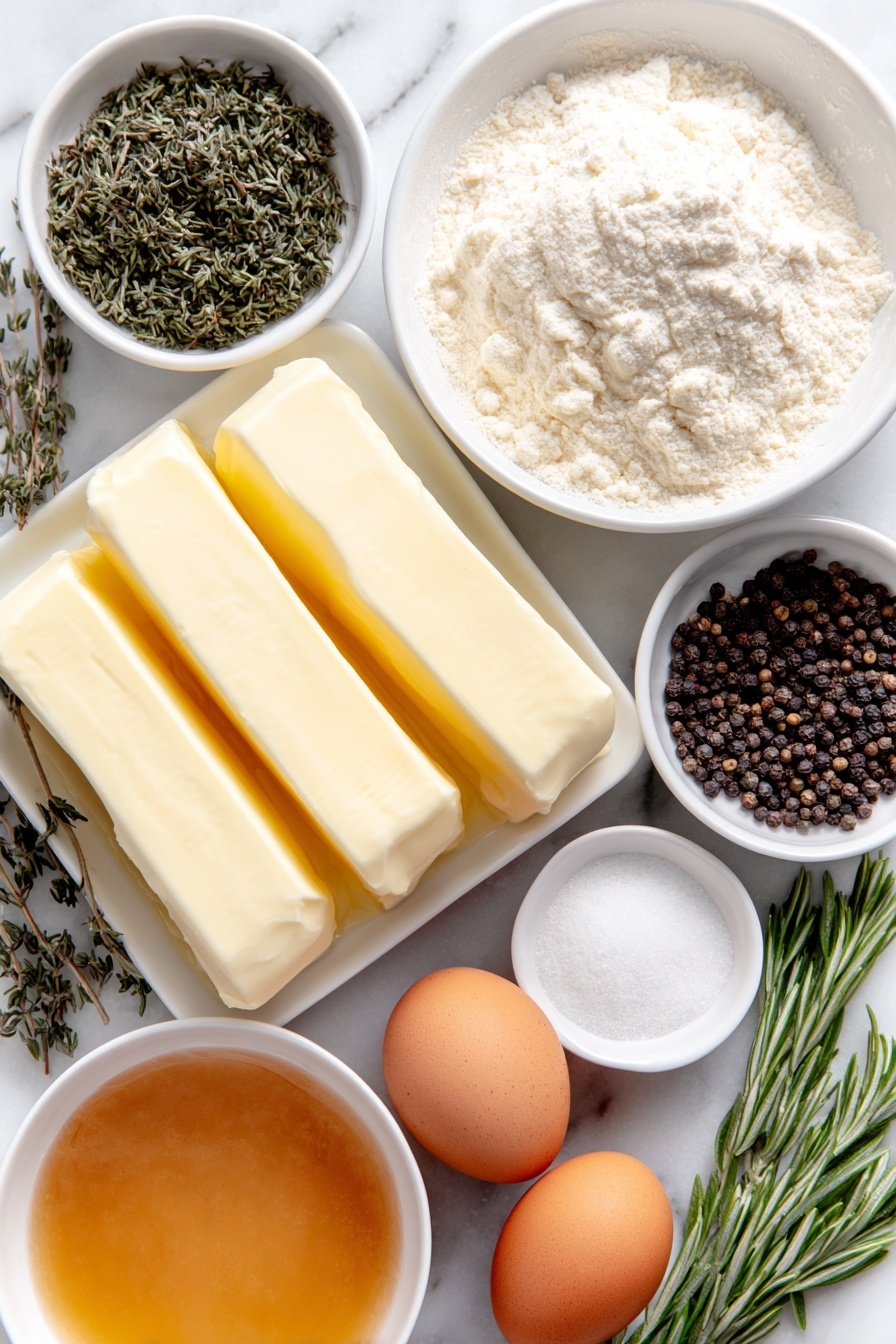
- Unsalted butter: I prefer unsalted so I can control the salt balance; it also helps make a smooth roux.
- Flour: This is your thickener. Cooking it long enough removes that raw taste and prevents lumps.
- Turkey drippings: The star player packed with concentrated turkey flavor and roasted goodness.
- Water: Used to adjust the consistency, especially when drippings aren’t enough to reach 4 cups.
- Granulated chicken bouillon (optional): Great for boosting savory depth if your drippings are light.
- Seasonings: Dried parsley, garlic powder, onion powder, thyme, sage, rosemary, and pepper add a subtle herbaceous note that enhances overall flavor.
Make It Your Way
What I really enjoy about this Homemade Turkey Gravy from Drippings Recipe is how adaptable it is. Whether you want it thick and rich or a bit lighter, you can customize easily to fit your meal and mood.
- Variation: Sometimes I add a splash of dry white wine or a teaspoon of Dijon mustard for a subtle kick that brightens up the flavor without overpowering the turkey essence.
- Dietary tweak: For a dairy-free version, try swapping butter with olive oil or vegan butter—it still turns out nicely, just with a slightly different richness.
- Herb swap: Feel free to experiment with fresh herbs if you have them on hand—rosemary and thyme really shine fresh, just add them at the end of simmering.
Step-by-Step: How I Make Homemade Turkey Gravy from Drippings Recipe
Step 1: Strain and Skim the Drippings
After roasting your turkey, carefully scoop the pan drippings into a fine mesh sieve set over a fat separator or a large freezer bag. Let it sit a few minutes so the fat rises to the top. If using a freezer bag, cut a tiny corner and slowly drain the bottom liquid into a measuring cup, stopping before the fat flows out. You want about 4 cups of mostly fat-free drippings. This step is crucial because too much fat can make your gravy greasy rather than silky.
Step 2: Make a Deep Golden Roux
Melt your butter over medium-low heat in a large saucepan. Whisk in the flour and keep stirring constantly for 4-5 minutes until the mixture turns a deep golden color. This slow cooking creates that beautiful nutty flavor and ensures a lump-free gravy. Don’t rush this part—it’s the foundation of a perfect gravy.
Step 3: Whisk in the Drippings Slowly
Turn the heat to low and gradually whisk in the strained turkey drippings (plus water if needed to reach 4 cups). Keep whisking until the mixture is smooth, with no lumps. This slow incorporation lets the roux absorb the liquid beautifully.
Step 4: Simmer Until Perfectly Thickened
Bring your gravy to a gentle simmer while continuously whisking. It usually takes 6-8 minutes to thicken. Remember, the gravy will thicken further as it cools, so aim for slightly thinner consistency than you want on the plate. If it gets too thick, whisk in a tablespoon of water at a time until just right.
Step 5: Season and Adjust to Taste
Now’s the fun part—tasting and tweaking. Start with a pinch of granulated chicken bouillon if you need more depth, then add dried parsley, garlic powder, onion powder, thyme, sage, rosemary, and pepper a little at a time. This lets you tailor the flavor exactly to your liking, because every batch of drippings varies.
Step 6: Keep Warm Until Serving
Once it’s perfect, keep your gravy warm on low heat, stirring often so it doesn’t stick or thicken too much. If it firms up while waiting, gently reheat and whisk in a splash of water to loosen it back up. Serving it in an insulated gravy jug helps keep it at the perfect serving temperature without drying out.
Top Tip
I’ve learned that patience really pays off with gravy—especially when making this Homemade Turkey Gravy from Drippings Recipe. Don’t rush the roux or skimp on straining, as these steps make all the difference in smoothness and flavor.
- Degreasing: Using a fat separator or freezer bag to remove excess fat ensures the gravy doesn’t taste greasy or stodgy—a step that beginners often overlook.
- Roux cooking: Cooking the flour and butter until golden—not just lightly cooked—adds a deep, toasty flavor and keeps lumps away.
- Whisk constantly: This stops the gravy from clumping and creates that hallmark smooth, velvety texture.
- Taste as you go: Since drippings vary so much, adjusting the seasoning bit by bit is how you nail the perfect balance every time.
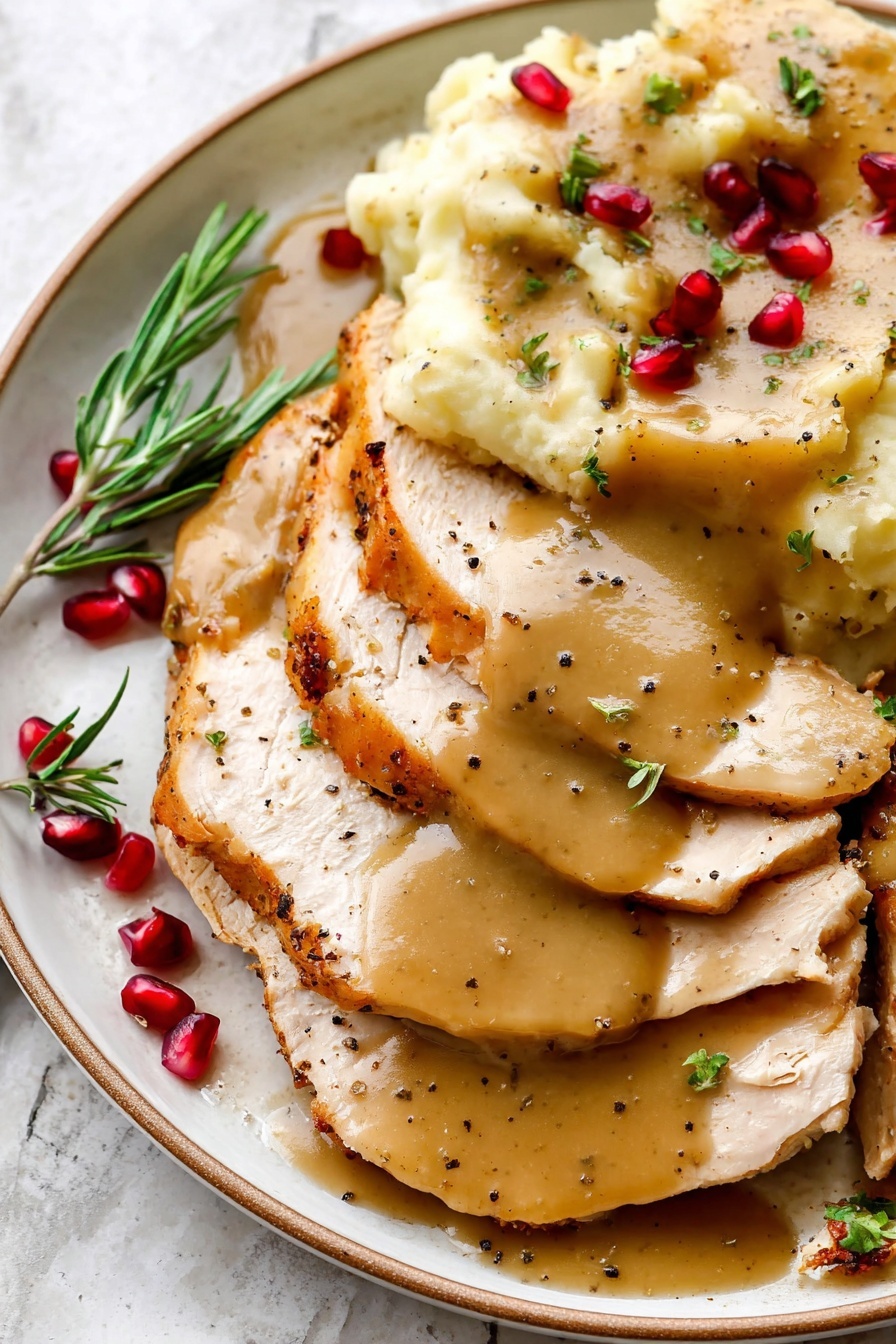
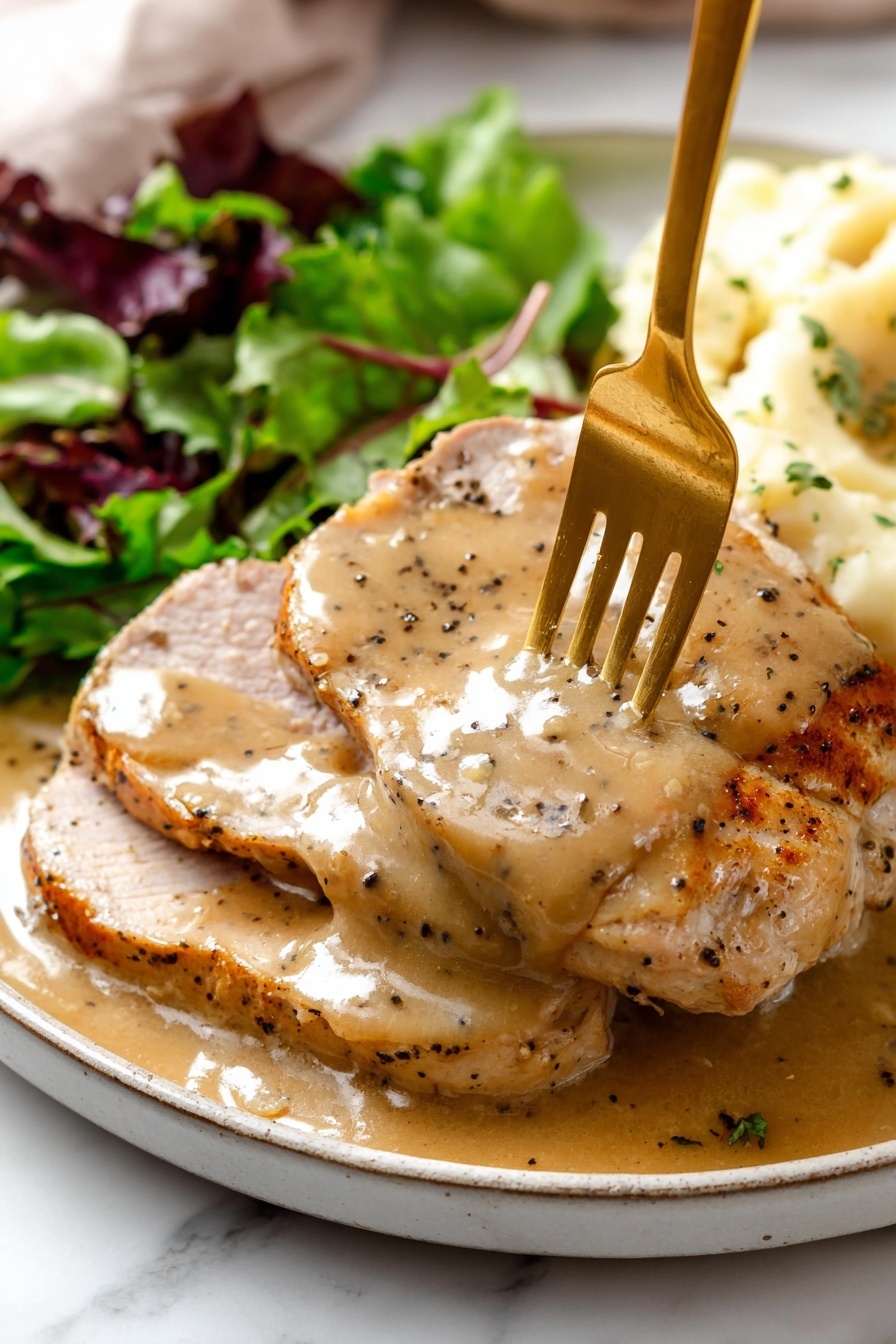
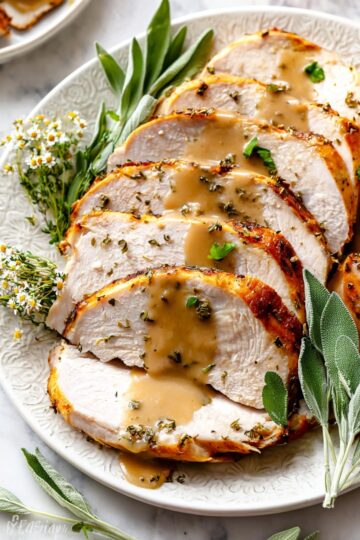
How to Serve Homemade Turkey Gravy from Drippings Recipe
Garnishes
I like to keep garnishes simple—just a sprinkle of fresh chopped parsley really brightens up the rich gravy. Sometimes, a few thyme leaves or a dash of freshly cracked black pepper adds a nice touch right before serving.
Side Dishes
This gravy pairs beautifully with classic sides like creamy mashed potatoes, buttery dinner rolls, roasted vegetables, and of course, tender slices of turkey breast. I’ve also served it over stuffing or even drizzled on steamed green beans for some extra flavor.
Creative Ways to Present
For special occasions, I like to pour the gravy into a beautiful ceramic gravy boat or insulated jug for that elegant touch. During big family dinners, setting up a gravy station with toppings like caramelized onions or fried sage can make it interactive and fun.
Make Ahead and Storage
Storing Leftovers
Leftover gravy stores really well. Just transfer it into an airtight container and pop it into the fridge where it’ll keep for up to 4 days. When you reheat it, add a splash of water and whisk to bring back that smooth texture.
Freezing
I often freeze leftover gravy in small portions so I can thaw only what I need. Use freezer-safe containers or bags, squeeze out the air, and freeze for up to 3 months. Thaw overnight in the fridge for best results.
Reheating
When reheating, do it gently on the stove over medium-low heat. Whisk constantly, and if the gravy feels too thick, add water a little at a time until it’s just right. This keeps the texture smooth and luscious, just like fresh.
Frequently Asked Questions:
Absolutely! While this Homemade Turkey Gravy from Drippings Recipe shines with drippings, you can use chicken broth or stock instead. The recipe includes instructions for making gravy without drippings—you’ll just lose some of that signature roasted flavor.
The key is to cook the flour and butter mixture (roux) long enough until it’s golden and to whisk constantly when you add the liquid. Adding the drippings slowly while whisking helps keep the texture silky smooth, as emphasized in this Homemade Turkey Gravy from Drippings Recipe.
Yes, you can make the gravy ahead and store it in the refrigerator for up to 4 days or freeze it for up to 3 months. Just reheat gently and whisk in a little water to restore the consistency before serving.
Gravy naturally thickens as it cools. If it’s too thick, you can whisk in a tablespoon of water at a time while reheating until you reach your desired consistency. If the gravy is too thin, continue simmering gently to reduce it slightly, but be patient to avoid burning.
Final Thoughts
This Homemade Turkey Gravy from Drippings Recipe is one of those trusty classics I always come back to—simple, dependable, and packed with flavor. I hope you find it as rewarding to make as I do, turning your turkey dinner into a truly comforting feast. Go on, give it a try and watch your guests savor every last drop!
Print
Homemade Turkey Gravy from Drippings Recipe
- Prep Time: 5 minutes
- Cook Time: 15 minutes
- Total Time: 20 minutes
- Yield: 2.5 cups
- Category: Sauce
- Method: Stovetop
- Cuisine: American
Description
A classic homemade turkey gravy recipe made from savory turkey drippings, butter, and flour, perfect for enhancing your roasted turkey. This recipe also includes an option to make gravy without drippings using chicken broth and herbs.
Ingredients
Turkey Gravy with Drippings
- 6 tablespoons unsalted butter
- ⅓ cup plus 1 tablespoon flour
- 4 cups turkey drippings plus water as needed
- Granulated chicken bouillon, as needed (optional)
- Seasonings as needed (dried parsley, garlic powder, onion powder, dried thyme, ground sage, dried minced rosemary, pepper, salt)
Turkey Gravy without Drippings
- 6 tablespoons unsalted butter
- ⅓ cup plus 1 tablespoon flour
- 4 cups reduced sodium chicken broth
- 1 teaspoon chicken bouillon (granulated, crushed cube or base)
- 1 teaspoon dried parsley
- ½ teaspoon garlic powder
- ¼ teaspoon each onion powder, dried thyme, pepper
- ⅛ teaspoon each ground sage, dried minced rosemary
- Salt to taste
Instructions
- Strain: Strain the turkey drippings from the roasting pan through a fine mesh sieve into a fat separator or large freezer bag. Discard solids caught in the sieve.
- Degrease: Let drippings rest so fat separates. Using the freezer bag method, cut a small corner of the bag and drain the liquid fat-free drippings into a measuring cup until you have 4 cups.
- Make 4 cups liquid: Add water if necessary to reach a total of 4 cups of liquid.
- Make roux: Melt butter in a large saucepan over medium-low heat. Whisk in flour and cook for 4-5 minutes until deeply golden, whisking constantly to prevent lumps.
- Add drippings: Reduce heat to low and slowly whisk in the turkey drippings. Whisk until smooth and no lumps remain.
- Simmer: Bring to a simmer while whisking constantly. Cook for 6-8 minutes until thickened. Add water if gravy becomes too thick.
- Salt to taste: Adjust salt by adding granulated chicken bouillon ¼ teaspoon at a time before adding salt to taste.
- Season to taste: Add dried parsley, garlic powder, onion powder, dried thyme, ground sage, dried minced rosemary, and pepper gradually as needed. Taste often.
- Keep warm before serving: Keep gravy on low heat, stirring regularly until ready to serve. Serve in an insulated gravy jug for best smoothness.
- Thin as needed: If gravy thickens upon cooling, reheat over medium-low heat and whisk in water to the desired consistency.
- Alternative without drippings: Melt butter over medium-low heat, whisk in flour and cook 4-5 minutes until golden. Reduce heat, slowly whisk in chicken broth, then add chicken bouillon and seasonings. Simmer 6-8 minutes until thickened, adjusting consistency with water. Season with salt and pepper. Keep warm and thin as needed.
Notes
- To store: Transfer leftover gravy to an airtight container and refrigerate for up to 4 days.
- To freeze: Place gravy in airtight container or freezer bags with excess air removed. Freeze up to 3 months. Thaw overnight in refrigerator before reheating.
- To reheat: Gently warm gravy in a saucepan, whisking in water as needed to restore smoothness and desired thickness.
- Do not shortcut cooking the roux; cooking it to a deep golden color prevents lumps and improves flavor.
- Adjust seasonings gradually to avoid over-salting, especially when using turkey drippings which vary in saltiness.
Nutrition
- Serving Size: ¼ cup
- Calories: 70 kcal
- Sugar: 0 g
- Sodium: 150 mg
- Fat: 5 g
- Saturated Fat: 3 g
- Unsaturated Fat: 2 g
- Trans Fat: 0 g
- Carbohydrates: 5 g
- Fiber: 0 g
- Protein: 0 g
- Cholesterol: 15 mg

Leave a Reply